7 Best Homemade Deep Conditioner Recipes for Natural Hair That Actually Work
Creating a homemade deep conditioner for natural hair is simple and allows you to customize ingredients for your hair’s specific needs.
Natural ingredients like shea butter, coconut milk, and yogurt provide deep hydration without harsh chemicals found in commercial products.
Most recipes require just 3-5 ingredients and 30 minutes of treatment time.
For best results, apply to damp hair, use heat activation with a warm towel or hooded dryer, and deep condition weekly or bi-weekly depending on your hair’s moisture needs.
Homemade deep conditioners work especially well for kinks, coils, and curls that need extra nourishment.
Why Natural Hair Needs Deep Conditioning
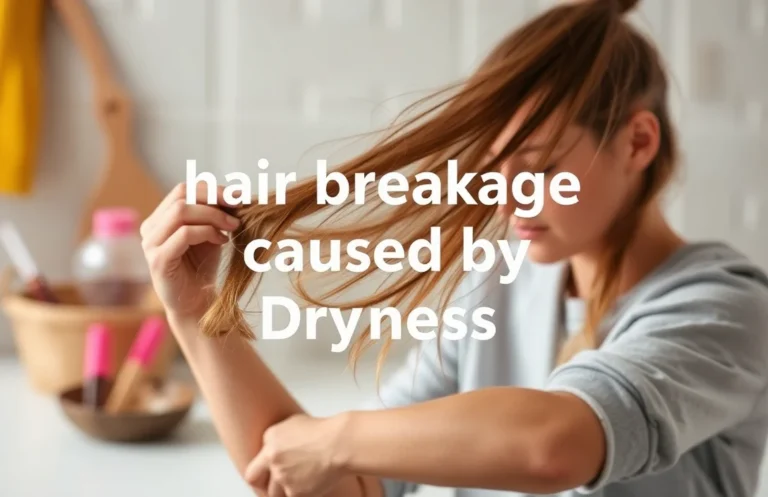
Natural hair needs deep conditioning because its unique structure makes it naturally prone to dryness and breakage.
Unlike straight hair, the sebum (natural oil) produced by the scalp struggles to travel down the tight curves of kinky and coily curl patterns. This leaves the mid-lengths and ends vulnerable to moisture loss.+1
Deep conditioning goes beyond surface-level hydration. It penetrates the hair cuticle the outermost protective layer to deliver nutrients directly into the cortex.
This process is essential for maintaining the protein-moisture balance required for healthy hair. When this balance is off, you may notice signs of distress such as excessive frizz, a straw-like texture, or a lack of elasticity where curls no longer “bounce back.”+3
Regular treatments help “fill the gaps” in the hair shaft, especially for those with high porosity hair that loses moisture as quickly as it absorbs it.
By incorporating a weekly or bi-weekly deep conditioner into your natural hair care routine, you can prevent split ends and ensure your strands remain supple and strong.
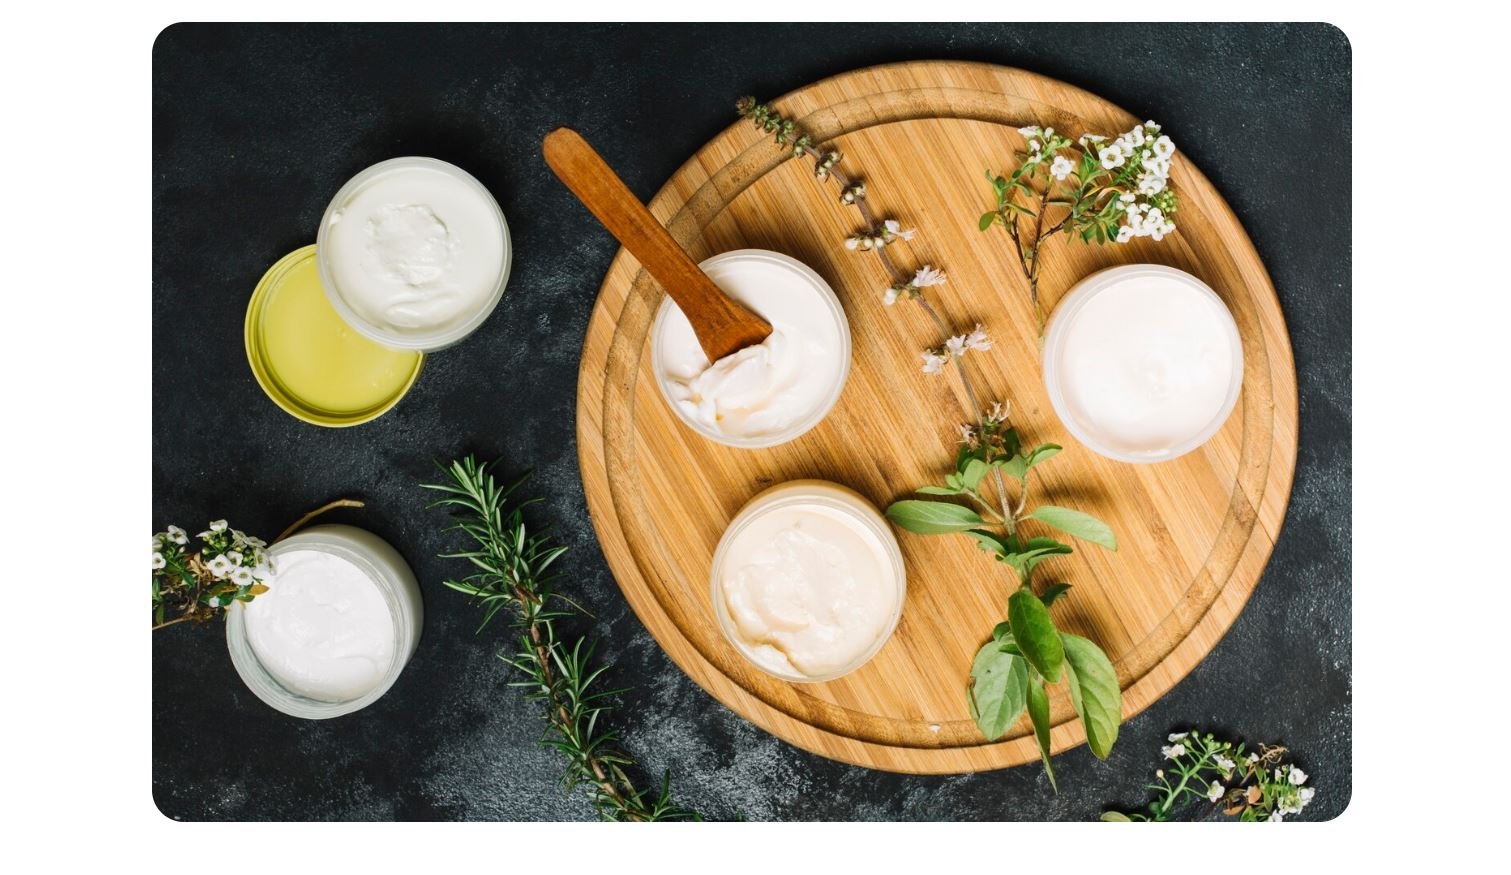
Key Ingredients for Homemade Deep Conditioners
Creating a DIY deep conditioner allows you to customize the nutrients based on your hair’s specific needs. Whether you are battling winter dryness or heat damage, kitchen staples can provide professional-grade results.
Moisturizing Ingredients
These ingredients focus on moisture retention and softening the hair fiber.
- Shea Butter: Packed with fatty acids, shea butter acts as an incredible emollient. It hydrates deeply and minimizes frizz, making it a “holy grail” for thicker kinks and coils.
- Coconut Milk: This ingredient nourishes the scalp while restoring moisture to damaged strands. It provides a lightweight hydration that doesn’t weigh down finer curl patterns.
- Coconut Oil: One of the few oils capable of penetrating the hair shaft, it helps prevent protein loss during the washing process.
- Avocado: Rich in vitamins E and B, avocados contain natural oils that provide deep hydration and help detangle stubborn knots.
- Aloe Vera: This plant-based powerhouse soothes the scalp and acts as a humectant, promoting long-term moisture retention.
Strengthening Ingredients
If your hair feels limp or snaps easily, you likely need protein treatments to rebuild the hair structure.
- Yogurt: The lactic acid in yogurt helps revive dry hair, while its vitamins strengthen the follicles and assist with dandruff control.
- Mayonnaise: Containing a mix of oils and egg proteins, mayonnaise is a classic remedy for restoring brittle, damaged hair.
- Eggs: Highly protein-rich, eggs add immediate strength and a healthy shine to weakened strands.
Shine & Softness Boosters
To give your hair a “fresh-from-the-salon” finish, add these ingredients to improve light reflection and texture.
- Bananas: Full of potassium and vitamins A, B, and C, bananas improve manageability and add a natural bounce to your curls.
- Honey: As a natural humectant, honey pulls moisture from the air and locks it into the hair, creating a silky shine.
- Olive Oil: This heavy-duty oil is perfect for sealing the cuticles, ensuring that the softness lasts long after you rinse.
7 Best Homemade Deep Conditioner Recipes
These homemade recipes offer professional results using natural ingredients found in your kitchen. Whether you are battling extreme dryness or looking to repair heat damage, these treatments provide the targeted care your curls need.
Recipe 1: Coconut Oil Deep Conditioner
Best For: All natural hair types, especially chronically dry hair.
This simple yet effective blend acts as a powerful sealant and penetrative treatment. Coconut oil is one of the few oils that can actually reach the hair cortex to prevent protein loss.
- Ingredients:
- 8 tablespoons coconut oil
- 4 tablespoons jojoba oil
- Optional: 5–10 drops of lavender or peppermint essential oil
- Instructions:
- Whisk the coconut oil and jojoba oil together in a bowl until smooth.
- Add essential oils if desired for a soothing scent and scalp stimulation.
- Apply the mixture to damp hair, working in small sections from root to tip.
- Cover with a shower cap and leave for 30 minutes. For an intensive treatment, you may leave it on overnight.
- Rinse thoroughly with lukewarm water and a mild shampoo.
- Benefits: Provides deep hydration, reduces frizz, and adds a protective layer to the hair shaft.
Recipe 2: Banana Deep Conditioner
Best For: Damaged hair and boosting natural shine.
Bananas are rich in potassium, natural oils, and vitamins that improve hair elasticity and prevent split ends.
- Ingredients:
- 1 ripe banana
- 2 tablespoons honey
- 2 tablespoons coconut oil
- Instructions:
- Pro Tip: Use a food processor or blender to mash the banana into a completely smooth paste to avoid difficult-to-rinse lumps.
- Blend in the honey and coconut oil until the texture is creamy.
- Apply to damp hair, focusing heavily on the oldest part of your hair—the ends.
- Cover with a shower cap for 30 minutes.
- Rinse with cool water to ensure all residue is removed.
- Benefits: Intense moisture infusion, enhanced shine, and improved manageability.
Recipe 3: Aloe Vera Deep Conditioner
Best For: Sensitive scalps and lightweight moisture.
Aloe vera has a pH level similar to your hair’s natural pH, making it excellent for sealing the cuticle and soothing irritation.
- Ingredients:
- 1/2 cup fresh aloe vera gel
- 2 tablespoons coconut oil
- 1 tablespoon honey (optional for extra humectant power)
- Instructions:
- Blend the aloe gel and coconut oil until they form a consistent, milky liquid.
- Add honey if your hair feels particularly “crunchy” or dry.
- Massage generously into your scalp and work down through the hair.
- Leave for 30 minutes under a plastic cap.
- Rinse well with lukewarm water.
- Benefits: Calms scalp inflammation, promotes healthy growth environments, and provides non-greasy hydration.
Recipe 4: Shea Butter & Avocado Deep Conditioner
Best For: Very dry, high-porosity, or coily hair (4B, 4C).
This is a heavy-duty treatment designed for hair that requires maximum moisture retention and “slip” for detangling.
- Ingredients:
- 1/4 cup softened shea butter
- 1 ripe avocado
- 2 tablespoons olive oil
- 1 tablespoon honey
- Instructions:
- Mash the avocado until it reaches a buttery consistency.
- Mix in the softened shea butter, olive oil, and honey until fully incorporated.
- Apply to damp hair in sections, ensuring every coil is coated.
- Cover with a shower cap and leave for 45 minutes to 1 hour.
- Rinse thoroughly; you may need a light co-wash to remove the richness of the shea butter.
- Benefits: Maximum moisture sealing, superior frizz control, and defined curl patterns.
Recipe 5: Yogurt & Honey Protein Treatment
Best For: Weak, brittle hair needing structural strength.
This treatment is designed for hair that feels overly soft, limp, or snaps easily. The lactic acid in yogurt gently cleanses the scalp while the proteins reinforce the hair shaft.
- Ingredients:
- 1/2 cup plain full-fat yogurt
- 2 tablespoons honey
- 1 tablespoon olive oil
- 1 egg (optional for an extra protein boost)
- Instructions:
- Mix the yogurt, honey, and olive oil in a small bowl.
- Whisk in a beaten egg if your hair is extremely weak.
- Apply to damp hair from roots to ends.
- Cover with a shower cap and leave for 20–30 minutes.
- Important: Rinse with cool water to prevent the egg from “cooking” in your hair.
- Benefits: Strengthens follicles, adds vital protein, and helps reduce dandruff.
- Note: Use this only once a month to avoid protein overload, which can make hair stiff.
Recipe 6: Mayonnaise Deep Conditioner
Best For: Heat-damaged or chemically-treated (colored/relaxed) hair.
Mayonnaise is a “powerhouse” ingredient containing oils, egg yolks, and vinegar. It creates a protective barrier around the hair, restoring the lipid layer often stripped by styling tools.
- Ingredients:
- 1/2 cup full-fat mayonnaise
- 1 tablespoon olive oil
- 1 tablespoon honey
- Instructions:
- Mix all ingredients until they reach a smooth, creamy consistency.
- Apply generously to damp hair, focusing on the most damaged areas (usually the ends).
- Cover with a shower cap and let sit for 30–45 minutes.
- Shampoo twice and rinse thoroughly to ensure the oil is removed.
- Benefits: Repairs external damage, restores protein, and adds immediate smoothness.
Recipe 7: Coconut Milk & Honey Hydrating Mask
Best For: All hair types, especially those needing gentle, weightless moisture.
If you have finer curls or low-porosity hair that gets weighed down easily, this is the perfect mask. Coconut milk is rich in vitamins and fats that nourish without leaving a heavy residue.
- Ingredients:
- 1 can full-fat coconut milk
- 3 tablespoons honey
- 2 tablespoons argan oil (or jojoba oil)
- Instructions:
- Shake the can of coconut milk well before opening.
- Mix with honey and your choice of oil until well combined.
- Apply to damp hair generously. Because this mixture is thinner, apply over a sink.
- Cover with a shower cap for 30–60 minutes.
- Rinse well with lukewarm water.
- Benefits: Nourishes the scalp, protects from environmental damage, and leaves a silky finish.
Choosing the Right Recipe for Your Hair
To help you decide which treatment to try first, refer to the table below based on your hair’s current condition.
| Hair Concern | Recommended Recipe | Primary Benefit |
| Severe Dryness | Shea Butter & Avocado | Maximum Moisture Sealing |
| Breaking/Shedding | Yogurt & Honey | Protein Reinforcement |
| Dull/Lack of Shine | Banana & Honey | Vitamin Infusion & Glow |
| Heat Damage | Mayonnaise | Damage Repair |
| Frizzy/Hard to Style | Coconut Oil & Jojoba | Frizz Control |
| Itchy/Dry Scalp | Aloe Vera & Coconut | Scalp Soothing |
Pro Tips for Maximum Moisture Retention
To get the most out of your homemade deep conditioners, follow these simple application techniques:
Use Low Heat
If you have low-porosity hair, your cuticles are tightly closed. Applying a warm towel over your shower cap or using a hooded dryer on a low setting helps open the cuticles. This allows the ingredients to penetrate rather than just sitting on top of the hair.
Section Your Hair
Natural hair is dense. Applying product to the “surface” usually means the middle layers stay dry. Divide your hair into at least four sections. Work the conditioner through each section using your fingers or a wide-tooth comb to ensure total coverage.
Always Start with Clean Hair
Deep conditioners work best on hair that has been freshly washed. Removing dirt and old product buildup ensures that the nutrients in your DIY mask can actually reach the hair fiber.
How to Apply Deep Conditioner for Maximum Results
To get the most out of your deep conditioner, you must move beyond simply “applying and rinsing.” The goal is to encourage the product to penetrate the hair cortex rather than just coating the surface. For maximum results, always apply your treatment to clean, damp hair. Shampooing first removes buildup, oils, and dirt that can act as a barrier, ensuring the nutrients have a direct path to the hair shaft.
Adding gentle heat is the ultimate game-changer for deep conditioning. Heat slightly lifts the hair cuticle, allowing moisturizing agents and proteins to enter the hair more effectively. This is especially crucial for those with low-porosity hair, where the cuticles are naturally tightly closed. By following a structured application method and using heat, you can increase moisture retention by up to 40%, leading to significantly softer and more resilient curls.
Step-by-Step Application
Follow this routine to ensure every strand is nourished:
- Start with Clean, Damp Hair: Shampoo thoroughly to prep the hair. Squeeze out excess water so it is damp, not dripping.
- Section Your Hair: Divide your hair into 4 to 8 sections using clips. This ensures even distribution and prevents you from missing the middle layers.
- Apply Generously: Saturate each section from root to tip. Do not skimp on product; your hair should feel “slippery” and fully coated.
- Focus on Ends: The ends are the oldest and most fragile parts of your hair. Apply extra conditioner here to prevent split ends and breakage.
- Detangle Gently: Use your fingers or a wide-tooth comb to work through knots while the conditioner provides “slip.”
- Cover with a Plastic Cap: A shower cap or plastic wrap traps the natural heat from your scalp and keeps the product from drying out.
- Add Heat (Optional but Recommended): Use one of the methods below to supercharge the treatment.
Heat Activation Methods
- Warm Towel: Wrap a damp, warm towel over your shower cap for a gentle, steady heat source.
- Hooded Dryer: Sit under a dryer for 20–30 minutes on a low or medium setting.
- Hair Steamer: This is the “gold standard” for professional results, as it provides both heat and moisture to open the cuticles.
- Body Heat: If you don’t have tools, simply wearing a plastic cap and a beanie for 30 minutes uses your own body heat to activate the mask.
Timing Guidelines
Leaving a conditioner on for too long can lead to “hygral fatigue,” where the hair becomes over-hydrated and weak. Use these benchmarks for the best balance:
| Condition Category | Recommended Time | Frequency |
| Light Moisture Needs | 15–20 Minutes | Weekly |
| Moderate Dryness | 30–45 Minutes | Weekly |
| Severely Damaged | 1–2 Hours | Bi-Weekly |
| Protein Treatments | 20–30 Minutes | Monthly |
How Often Should You Deep Condition?
Determining the right frequency for deep conditioning is a balancing act. Your schedule should be dictated by your hair’s current health, porosity, and texture. While it is tempting to condition as often as possible, your hair needs a cycle of washing and drying to maintain its internal structure.
Frequency Guidelines
- Normal/Healthy Hair: Once every 2 weeks is usually sufficient to maintain elasticity.
- Dry/Damaged Hair: Once a week helps to repair the moisture barrier and smooth the cuticle.
- Very Dry/4C Hair: 1–2 times per week may be necessary due to the tight coil pattern preventing natural oils from reaching the ends.
- Protein Treatments: Once a month only. Excessive protein can lead to “protein overload,” making hair stiff and snap-prone.
Signs of Over-Conditioning (Hygral Fatigue)
If you deep condition too frequently or for too long, your hair may become over-hydrated. Signs include hair that feels mushy, limp, or unusually stretchy when wet. You might also notice a loss of your natural curl pattern or increased shedding.
Signs You Need More Conditioning
If your hair feels like straw, it’s thirsty. Persistent dryness, frequent tangles, and a “dull” appearance are all cries for help. If you see split ends traveling up the hair shaft or experience “crunchy” frizz, it is time to increase your treatment frequency.
Storage and Shelf Life of DIY Treatments
Because homemade deep conditioners use fresh, food-grade ingredients, they do not contain the preservatives found in store-bought products. Proper storage is vital to prevent bacterial growth and ensure the nutrients remain active.
Storage Tips
- Refrigerate: Always keep leftovers in the fridge. Cold temperatures slow down spoilage.
- Airtight Glass: Use glass jars with tight seals to prevent odors from the fridge from seeping into your hair mask.
- Labeling: Mark the container with the date you made it. If it smells “off” or changes color, toss it immediately.
- Avoid Contamination: Never dip your fingers into the jar. Use a clean spoon to scoop out what you need to keep the batch sterile.
Shelf Life by Ingredient
| Ingredient Base | Storage Life (Refrigerated) |
| Banana/Avocado | 2–3 Days (oxidizes quickly) |
| Yogurt/Mayonnaise | 3–5 Days |
| Oil-Based (No water) | 1–2 Weeks |
| Honey/Aloe | Up to 2 Weeks |
Pro Tip: If you find you’ve made too much, freeze the mixture in ice cube trays. Pop out one or two cubes for your next wash day—they thaw quickly and stay fresh for months in the freezer!
Common Mistakes to Avoid
Even with the best ingredients, your deep conditioning efforts can be wasted if your technique is flawed. Avoid these common pitfalls to keep your natural hair thriving.
- Protein Overload: Using too much protein (like eggs or yogurt) every week can cause “brittleness.” Balance your protein hits with pure moisture masks to keep the hair flexible.
- Poor Rinsing: If you don’t rinse thoroughly, the heavy oils and fats will leave a film. This causes buildup, which eventually blocks future moisture from entering the hair.
- Skipping the Heat: For high-density or low-porosity hair, skipping heat means the product just sits on the surface. Without heat, you are only doing a surface-level “quick” condition.
- Dirty Hair Application: Applying a mask to hair covered in gels and butters is like trying to lotion your skin through a raincoat. Shampoo first to clear the path.
- Rinsing with Hot Water: Hot water re-opens the cuticles you just worked so hard to smooth. Always use cool or lukewarm water for your final rinse to “lock in” the treatment and add shine.
- The Banana Blunder: Never mash a banana with a fork for your hair. Small chunks will get stuck in your curls and are nearly impossible to remove without a comb. Always use a blender.
FAQ Section
Q: Can I use these deep conditioners on color-treated hair?
A: Yes, but avoid lemon juice or clarifying ingredients that may strip color.
Q: How do I know if I need moisture or protein?
A: Wet hair test – if it stretches too much, you need protein. If it breaks easily, you need moisture.
Q: Can I leave deep conditioner in overnight?
A: Moisturizing conditioners yes, protein treatments no (can cause damage).
Q: Will these recipes work on low porosity hair?
A: Yes, but use heat to help ingredients penetrate. Lighter oils (jojoba, argan) work better than heavy butters.
Q: Can I add essential oils?
A: Yes! Rosemary, peppermint, and lavender promote scalp health and hair growth.
Q: How long until I see results?
A: Most people notice softer hair immediately. Significant improvement in strength/growth takes 4-6 weeks of consistent use.
Gemini said
Conclusion: Your Journey to Healthier Natural Hair
Achieving vibrant, bouncy curls doesn’t require a massive budget or a shelf full of chemical-heavy products. As we’ve explored, the 7 easy DIY recipes provided here cover every possible hair need from the intense structural repair of a Yogurt & Honey Protein Treatment to the weightless hydration of a Coconut Milk Mask. By using simple, natural ingredients you likely already have in your kitchen, you can bypass the “filler” ingredients found in many commercial products and give your hair the raw nutrients it craves.
These homemade deep conditioners are a cost-effective, highly customizable alternative to expensive salon treatments. Because you are the “chemist,” you can adjust the honey for more shine, the avocado for more slip, or the protein for more strength, ensuring the formula perfectly matches your hair’s unique porosity and texture.
Take Action This Week
Don’t let your hair stay thirsty! We challenge you to start with just one recipe this week—perhaps the Coconut Oil mask for a simple moisture boost. Once you see the difference in your curl definition and softness, you’ll never look at your pantry the same way again.
- Join the Conversation: Which recipe will you try first? Share your choice in the comments below!
- Save & Share: Pin this guide for your next wash day, and share it with a friend who is looking for a more natural approach to hair care.
Final Encouragement: Natural hair care doesn’t have to be complicated or overwhelming. With these tools in your kit, you have total control over your hair’s health. Happy conditioning!
- Does Summer Really Boost Hair Growth Speed? Insights and Facts - March 31, 2026
- Medium Hairstyles for School: 25 Best Looks That Are Easy - March 31, 2026
- Hairstyles for Medium Hair for School: Easy and Stylish - March 31, 2026