Easy Homemade Leave-In Conditioner Recipes for Curly Hair
Dry curly hair drinks moisture faster than it holds it. Store-bought leave-ins are expensive, loaded with silicones, and often built for straight hair first. A homemade leave-in conditioner gives you control over every ingredient, costs a fraction of the price, and works directly on your curl type.
This guide covers 12 core topics, from ingredient science to application methods to storage. Every recipe is tested, practical, and built for real curly hair.
1. What Is a Leave-In Conditioner and Why Curly Hair Needs It

A leave-in conditioner is a lightweight moisturizing product applied to wet or damp hair after washing. Unlike a rinse-out conditioner, you do not wash it out. It stays on the hair shaft through the day, continuously releasing moisture and reducing friction between strands.
Curly hair has a structural reason for dryness. The natural curl pattern prevents sebum, the scalp’s natural oil, from traveling down the hair shaft. Straight hair gets coated in seconds. Type 3 and Type 4 curls can go weeks without a drop of scalp oil reaching the ends. A leave-in conditioner fills that gap.
How Leave-In Conditioners Differ from Rinse-Out Conditioners
Rinse-out conditioners are formulated with heavy emollients and occlusives designed to work in 3 to 5 minutes under water pressure. They coat the hair temporarily and wash away. Leave-ins are lighter, water-based, and built for prolonged contact without buildup. They penetrate the hair shaft instead of just coating it.
A rinse-out conditioner left in too long causes limp, heavy curls. A leave-in conditioner designed for overnight or all-day wear delivers steady moisture without that weight. The key difference is the concentration of humectants, ingredients that bind water to the hair shaft, which are higher in leave-ins.
Why Curly Hair Loses Moisture Faster Than Straight Hair
Curly hair has more surface area exposed per strand than straight hair. Every bend in a curl creates a point where the cuticle lifts slightly. Lifted cuticles release moisture into the air. In low-humidity environments, this happens rapidly. High porosity curls, hair that has been heat-damaged or chemically treated, lose moisture even faster because the cuticle layer is permanently lifted.
Type 4 coils have the tightest curl pattern and the most bends per inch. This makes them the most prone to dryness. Studies from the Journal of Investigative Dermatology confirm that African-textured hair has lower average water content per strand compared to straight or wavy hair, not because of genetics but because of structural exposure.
Signs Your Curly Hair Needs a Leave-In Conditioner
Your curls are telling you they need more moisture. The signals show up in texture, appearance, and behavior. Single-strand knots form constantly. Ends look white or translucent. Curls lose definition within an hour of styling. Shrinkage is extreme and uneven. The hair feels rough, not silky, when wet.
If you run a single strand between two fingers and it snaps rather than stretches, your hair is moisture-deficient. Healthy, hydrated curls stretch at least 30% of their length before breaking. Dry, brittle strands snap immediately. A leave-in conditioner addresses this directly by restoring water content to the cortex of the hair shaft.
Key Benefits of Homemade Leave-In for Dry Curly Hair
- Reduces breakage by improving elasticity before styling
- Defines curl clumps by sealing strands together with lightweight oils
- Cuts detangling time by up to 50% when applied to wet hair
- Costs 70 to 90% less than comparable store-bought products
- Free from sulfates, silicones, and synthetic fragrance
- Fully customizable for your porosity, curl type, and season
- Safer for children and people with scalp sensitivities
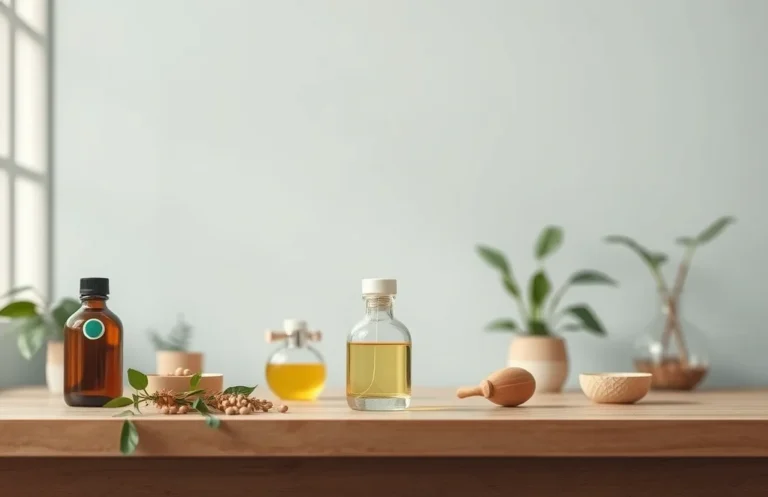
2. Best Ingredients for Homemade Leave-In Conditioner

The quality of your leave-in depends entirely on what goes into it. Every ingredient has a function. Some attract water. Some seal it in. Some strengthen the hair shaft. Knowing what each ingredient does lets you build a recipe for your exact hair needs rather than copying a generic formula.
Moisturizing Oils That Support Curl Definition
Not all oils behave the same way on curly hair. Penetrating oils absorb into the cortex and strengthen from within. Sealing oils sit on the surface and lock in moisture. For a leave-in conditioner, you want a combination of both.
Coconut oil is the most studied penetrating oil for hair. It reduces protein loss during washing by up to 39%, according to research published in the Journal of Cosmetic Science. Argan oil conditions and reduces frizz without buildup. Jojoba oil mimics sebum and works well for scalp-adjacent application. Castor oil thickens and adds slip but should be diluted to no more than 10% of a recipe due to its weight.
Protein Ingredients That Rebuild Damaged Curls
Protein fills gaps in damaged cuticle layers and temporarily repairs breakage points. Rice water contains inositol, a carbohydrate that repairs and protects the hair shaft. Hydrolyzed proteins in eggs and yogurt are small enough to penetrate the cortex. Silk amino acids, available online, bond to the hair and improve tensile strength.
The key word is hydrolyzed. Whole proteins from eggs or milk are too large to penetrate the hair shaft. They coat it instead, which adds temporary strength but builds up quickly. Hydrolyzed proteins are broken into smaller chains that actually absorb. For a DIY recipe, rice water is your most accessible hydrolyzed protein source.
Natural Humectants That Draw Moisture Into the Hair
Humectants pull water from the environment and bind it to the hair shaft. Aloe vera gel is the best all-around humectant for DIY leave-ins. It is 99% water, contains 75 active compounds including vitamins A, C, and E, and has a pH close to hair’s natural pH of 4.5 to 5.5. This keeps the cuticle flat.
Glycerin draws moisture aggressively. In humid climates, it works extremely well. In dry climates, it can draw moisture out of the hair shaft instead of into it. Use glycerin at no more than 5% of your recipe in dry environments. Honey is another humectant that adds a light conditioning effect, but use it sparingly. Too much makes hair sticky.
Ingredients to Avoid in DIY Leave-In Recipes
- Petroleum jelly and mineral oil: block moisture rather than seal it
- Beeswax: causes severe buildup, extremely difficult to remove
- Isopropyl alcohol: dries the hair shaft aggressively
- Lemon juice: drops pH too low and causes cuticle damage over time
- Essential oils undiluted: cause scalp burns, especially on children
- Tap water with high mineral content: mineral deposits block moisture absorption, use distilled water instead
- Heavy butters like mango butter without emulsifiers: separate in the bottle and coat unevenly
3. Simple 3-Ingredient Leave-In Conditioner Recipe

This is the starting point for every curly hair beginner. Three ingredients cover the basics: water for moisture, conditioner for slip and coating, and a light oil for sealing. It takes 5 minutes to make, costs under $3 per batch, and works on all curl types from Type 2 to Type 4.
What the Ingredients Do and Why They Work Together
Distilled water is the base. It carries moisture directly to the hair shaft. Using tap water introduces minerals that sit on the cuticle and block absorption over time. A water-soluble rinse-out conditioner diluted in water becomes thin enough to spray or rake through curls without weight. It provides slip, detangling, and a light coat of emollients.
A light oil like sweet almond or grapeseed oil completes the formula. It seals the water and conditioner into the hair before evaporation. Without the oil, the water evaporates within 20 minutes and the hair returns to its dry state. The oil slows that evaporation and keeps the moisture locked in for hours.
Full Recipe with Measurements
Mix these in a spray bottle:
- 1 cup distilled water
- 2 tablespoons water-soluble leave-in or rinse-out conditioner
- 1 teaspoon sweet almond oil or grapeseed oil
Shake well before every use. The oil and water will separate between applications, which is normal and not a sign the recipe failed.
How to Apply This Recipe to Wet Curly Hair
Apply immediately after washing while hair is soaking wet. Section hair into four parts. Spray each section generously and rake through from ends to roots with fingers. Scrunch upward to encourage curl clumping. Do not rub or towel dry after applying. Air dry or use a diffuser on low heat.
The wetter the hair, the better this recipe performs. Applying to damp hair works, but wet hair allows the water-based formula to blend into the hair shaft more effectively. If you apply to dry hair, mist with water first.
Storage and Shelf Life Guidelines
| Ingredient Added | Shelf Life at Room Temp | Shelf Life Refrigerated |
|---|---|---|
| Water only | 3 to 5 days | 7 to 10 days |
| Conditioner added | 5 to 7 days | 2 weeks |
| Oil added | 5 to 7 days | 2 weeks |
| Vitamin E added | 10 to 14 days | 3 to 4 weeks |
- Write the date on the bottle with a marker
- Discard if the smell changes or the mixture becomes cloudy
- Make small batches of 2 to 4 ounces to reduce waste
- Use dark or amber spray bottles to slow oxidation
- Add 5 drops of vitamin E oil to extend shelf life
4. Aloe Vera and Coconut Oil Leave-In Conditioner Recipe

This combination is one of the most popular DIY leave-ins for curly hair, and for good reason. Aloe vera provides intense moisture, seals the cuticle at the right pH, and reduces frizz. Coconut oil penetrates the shaft and reduces protein loss. Together, they address the two biggest problems dry curly hair faces.
Why Aloe Vera and Coconut Oil Work So Well Together
Aloe vera’s pH of 4.5 matches the hair’s natural acidic pH. When the hair shaft is exposed to alkaline substances like hard water or baking soda, the cuticle opens. Aloe vera closes it. Closed cuticles reflect light and create the glossy, defined look that dry curls lack. Aloe also contains proteolytic enzymes that remove dead cells from the scalp and stimulate follicle activity.
Coconut oil reinforces the aloe’s work by filling micro-gaps in the cuticle. A 2003 study in the Journal of Cosmetic Science found that coconut oil applied before washing reduced protein loss by 39% compared to mineral oil or sunflower oil. When used in a leave-in, it extends moisture retention throughout the day.
Full Recipe with Exact Ratios
You need:
- 3 tablespoons fresh aloe vera gel (or store-bought 100% aloe)
- 1 tablespoon fractionated coconut oil
- 3 tablespoons distilled water
- 5 drops lavender essential oil (optional, add only for adults)
Blend the aloe and water together first. Add coconut oil slowly while stirring. Pour into a small container or pump bottle. Fractionated coconut oil stays liquid at room temperature and mixes more evenly than solid coconut oil. Do not substitute with regular coconut oil unless you melt and cool it first.
How to Customize This Recipe for Your Curl Type
Type 2 wavy hair: Reduce coconut oil to half a teaspoon. Wavy hair does not need as much sealing and gets weighed down easily. Add a pinch of sea salt to enhance wave texture.
Type 3 curls: Use the recipe as written. This formula is calibrated for medium-porosity Type 3 curls.
Type 4 coils: Double the coconut oil to 2 tablespoons and add half a teaspoon of raw shea butter, melted. Type 4 hair needs heavier sealing due to its tight curl pattern and higher dryness rate.
High porosity hair: Add 1 teaspoon of apple cider vinegar to close the cuticle further. This works especially well after heat damage or chemical treatments.
Common Mistakes When Making This Recipe
- Using aloe vera gel with added dyes or alcohol: These cancel out the moisturizing benefits. Check the ingredient list for “denatured alcohol” or “SD alcohol.”
- Using solid coconut oil without melting it: It clumps and distributes unevenly across curls.
- Applying too much: A pea-size amount per section is enough. More causes buildup within 2 wash cycles.
- Storing at room temperature for more than a week: Fresh aloe spoils quickly. Refrigerate and use within 7 days.
- Skipping the water: Aloe and coconut oil without a water base creates a paste that sits on top of the hair rather than absorbing.
5. Shea Butter Leave-In Conditioner for Type 4 Coily Hair
Type 4 hair, especially 4B and 4C, has the tightest coil pattern and the highest surface area exposure per strand. Standard water-based leave-ins evaporate too quickly to provide lasting moisture. Shea butter changes that. It creates a semi-occlusive barrier that slows moisture loss for hours longer than oils alone.
Why Shea Butter Is the Right Choice for Coily Hair
Raw shea butter contains stearic acid, oleic acid, and linoleic acid, a fatty acid profile that closely matches the hair’s own lipid layer. This makes it one of the few plant-based butters that supplements rather than just coats the hair. It also contains vitamins A and E, which support scalp health and reduce flaking.
Shea butter’s melting point is around 89 to 95 degrees Fahrenheit. It melts on contact with warm, freshly washed hair, which allows it to spread evenly across coils without dragging or pulling. This matters for Type 4 hair because aggressive detangling is a primary cause of breakage.
Full Shea Butter Leave-In Recipe
You need:
- 2 tablespoons raw shea butter
- 1 tablespoon argan oil
- 1 tablespoon aloe vera gel
- 2 tablespoons distilled water
- 1 teaspoon glycerin (reduce to half a teaspoon in dry climates)
Melt shea butter using a double boiler until fully liquid. Remove from heat and allow to cool for 5 minutes but not solidify. Whip with a hand mixer for 2 minutes until fluffy. Slowly add argan oil while mixing. Blend in aloe vera and water last. Store in a wide-mouth jar. Apply to soaking wet hair in small sections.
How to Melt and Blend Shea Butter Without Losing Its Properties
Raw shea butter should never be microwaved. Microwaving destroys the vitamin A content and changes the fatty acid structure. Use a double boiler with water at a low simmer, not a rolling boil. Keep the shea butter in the heat only until it liquefies, then remove immediately.
Overheating shea butter also changes its texture permanently. You will notice it becomes grainy when it re-solidifies. This graininess is the result of fat crystals reforming irregularly after high heat. Grainy shea butter is still safe to use but absorbs less efficiently. To restore texture, melt gently again and cool in the refrigerator for 30 minutes.
Signs This Recipe Is Working on Your Hair
- Coils feel soft and pliable 24 hours after application, not just immediately after
- Shrinkage reduces by 15 to 20% compared to dry-hair baseline
- Single-strand knots form less frequently within the first two weeks of use
- Ends stop looking white or translucent after three to four washes
- Detangling time drops noticeably, less resistance on the comb or fingers
- Hair retains moisture in air-conditioned or low-humidity environments
6. Lightweight Spray Leave-In Conditioner for Fine Curly Hair
Fine curly hair is easily weighed down. A formula that works beautifully on thick Type 4 coils will flatten Type 2 waves or limp Type 3 ringlets within an hour. Fine curly hair needs a water-dominant, oil-light recipe that adds moisture without adding weight.
Why Fine Curls Need a Different Formula
Fine hair strands have a smaller diameter and less structural integrity than coarse hair. They flatten under heavy products. Butters and heavy oils coat fine strands and pull them apart, destroying curl formation. The cuticle of fine hair is also thinner, which means it absorbs product faster but reaches saturation with smaller amounts.
The goal for fine curly hair is hydration without coating. Water-soluble humectants like aloe vera and panthenol (vitamin B5) absorb into the strand without leaving a film. They increase moisture content without adding physical weight to the curl.
Lightweight Spray Recipe for Fine Curly Hair
You need:
- 1 cup distilled water
- 1 tablespoon pure aloe vera juice (thinner than gel)
- 1 teaspoon argan oil or grapeseed oil
- Half a teaspoon panthenol powder (available online or at cosmetic suppliers)
- 3 drops rosemary essential oil (only for adults)
Dissolve panthenol in warm distilled water first. Add aloe vera juice and stir. Add oil last. Pour into a fine-mist spray bottle. Shake before every use.
How to Apply Without Weighing Curls Down
Spray from a distance of 8 to 10 inches, not directly against the hair. This distributes smaller droplets more evenly. Use 3 to 5 sprays per section maximum. Scrunch upward immediately after spraying, do not rake through. Raking breaks fine curl clumps apart.
Avoid applying to the roots. Fine hair at the root is most prone to going flat. Focus product application from the mid-shaft to the ends where dryness is most severe. If roots become oily-looking after application, reduce the oil content in your next batch.
Best Lightweight Oils for Fine Curly Hair
| Oil | Weight | Absorption Rate | Best Use |
|---|---|---|---|
| Grapeseed oil | Very light | Fast | Daily leave-in |
| Argan oil | Light | Medium | Frizz control |
| Sweet almond oil | Light | Medium | Shine and softness |
| Jojoba oil | Light | Slow | Scalp and ends |
| Avocado oil | Medium | Medium | Protein boost |
| Castor oil | Heavy | Slow | Avoid in fine hair |
- Avoid coconut oil in fine hair unless used in tiny amounts, it solidifies and clumps
- Fractionated coconut oil stays liquid and works better than solid coconut oil
- Test new oils on a single strand before applying to all hair
- Rotate oils every 4 to 6 weeks to prevent buildup sensitivity
7. Protein-Rich Leave-In Conditioner for Damaged Curly Hair
Heat damage, chemical processing, and over-manipulation break down the protein bonds in the hair cortex. Moisture alone cannot fix this. Damaged curly hair needs protein to fill the gaps in the cuticle, rebuild tensile strength, and stop breakage. A protein-rich leave-in is a targeted repair treatment, not just daily hydration.
How to Tell If Your Hair Needs Protein vs Moisture
The wet stretch test is your most reliable diagnostic tool. Pull a single wet strand between two fingers. If it stretches and snaps, you need moisture. If it stretches very little and snaps immediately with a dry, brittle feel, you need protein. If it stretches excessively and feels mushy before snapping, you need significant protein.
Mushy wet hair is a sign of hygral fatigue, too much water entering and exiting a damaged cuticle repeatedly. This weakens the cortex. Adding moisture makes it worse. Protein reinforces the cuticle and restores its ability to control water intake. Once protein balance is restored, moisture treatments work effectively again.
Rice Water Protein Leave-In Recipe
Rice water is fermented or plain starchy water drained from soaking raw rice. It contains inositol, a small carbohydrate molecule that penetrates the hair shaft and repairs from within. Fermented rice water is stronger. Plain rice water is gentler and better for first-time use.
You need:
- Half a cup plain rice water (rinse rice with 2 cups water, let sit 30 minutes, drain)
- 2 tablespoons aloe vera gel
- 1 teaspoon argan oil
- Half a teaspoon glycerin
Mix all ingredients in a spray bottle. Apply to damp hair after washing. Leave in for 10 minutes before styling. Do not use more than once per week. Protein overuse causes its own form of breakage.
How to Balance Protein and Moisture Correctly
Protein and moisture work as a system. Too much protein without moisture causes brittleness. Too much moisture without protein causes limpness and breakage. The correct balance depends on your hair’s condition, not a fixed schedule.
After each protein treatment, follow with a deep moisture treatment within 48 hours. This restores flexibility to the newly strengthened hair shaft. A deep conditioner with shea butter, olive oil, or honey counterbalances the stiffening effect of protein. Protein treatments every 2 to 4 weeks are enough for most damaged hair. Healthy hair needs protein once a month or less.
Warning Signs of Protein Overload in Curly Hair
- Hair feels stiff and straw-like even when wet
- Curls lose elasticity and bounce
- Hair snaps at the slightest tension during detangling
- New breakage appears at the mid-shaft rather than the ends
- Scalp itchiness increases after protein application
- Hair looks dull rather than shiny after styling
8. How to Apply Homemade Leave-In Conditioner Correctly
The most effective leave-in recipe fails if you apply it incorrectly. Technique determines how well moisture penetrates, how long it lasts, and whether your curls clump or frizz. Most people rush through application. This section slows it down.
The LOC and LCO Methods Explained
LOC stands for Liquid, Oil, Cream. LCO stands for Liquid, Cream, Oil. These are the two most widely used moisture layering methods for curly hair. The order you apply products determines how long moisture stays in the hair.
In the LOC method, the oil goes before the cream. The oil seals the water into the hair shaft, and the cream provides a final protective layer. This works well for high porosity hair that loses moisture fast. The oil barrier slows water evaporation before the cream can be applied.
In the LCO method, cream goes before oil. The cream, typically a leave-in conditioner, is applied directly to wet hair first for maximum water absorption. Then the oil seals both the water and the cream in. This works better for medium to low porosity hair that absorbs products more slowly.
How Much Leave-In Conditioner to Use Per Section
Hair length guides product quantity. A tablespoon-sized amount per section is a starting point for medium-length hair. Less for fine hair. More for thick, long, or extremely dry hair. The hair should feel slippery and coated, not soaking wet with product.
Overloading product does not improve results. Excess leave-in sits on the surface of the hair rather than absorbing, creating a film that blocks subsequent products and causes buildup. Buildup attracts dirt, dulls curl definition, and requires more frequent washing to remove.
How to Apply Leave-In to Different Curl Sections
Section hair into four quadrants before applying. Two sections on top, two on the bottom. Work from the back sections forward. Apply leave-in to each section while the rest of the hair stays clipped up. This prevents drying before you reach the front sections.
Apply in a “praying hands” motion, pressing product between both palms and smoothing down the hair shaft from roots to ends. Follow with finger coiling or scrunching to define individual curl groups. Do not disturb the curls once they start to dry. Touching curls mid-dry breaks the hydrogen bonds forming between strands and creates frizz.
Mistakes That Kill Curl Definition After Application
- Applying to hair that is too dry: wet hair is essential for water-based formulas to work
- Rubbing with a cotton towel after application: a microfiber towel or cotton T-shirt only
- Using too much product and not distributing evenly across each section
- Applying in a warm, humid room then walking into air-conditioning immediately
- Not sealing with an oil after a water-based leave-in in dry climates
- Touching, fluffing, or separating curls before they are fully dry
9. How to Store Homemade Leave-In Conditioners Safely

A homemade leave-in conditioner without preservatives has a short shelf life. Water-based products grow bacteria and mold within days at room temperature. Understanding storage is not optional. Using a contaminated product on your scalp causes infections, itching, and hair loss in severe cases.
Shelf Life of Common DIY Ingredients at Room Temperature
Fresh aloe vera gel lasts 1 to 2 days unrefrigerated. Store-bought 100% aloe with no added preservatives lasts 7 days refrigerated. Distilled water lasts indefinitely in a sealed container but grows bacteria once mixed with organic ingredients. Coconut oil lasts 2 years in a cool, dry place. Shea butter lasts 18 to 24 months. Castor oil lasts 1 year. Any water-based mixture containing organic ingredients must be refrigerated and used within 2 weeks.
Best Containers for Storing Homemade Leave-In
Glass containers are the gold standard. They do not leach chemicals, they do not retain odors from previous batches, and they are easy to sterilize. Amber glass spray bottles keep light-sensitive oils from oxidizing. For thicker creams and butters, wide-mouth glass jars with airtight lids work best.
Avoid clear plastic bottles for oil-based recipes. UV light degrades oils in clear plastic within days. If you use plastic, choose HDPE (number 2 on the bottom) rather than softer plastics that absorb and leach. Always sterilize containers before each new batch by rinsing with boiling water or a 5% white vinegar solution.
How to Tell If Your Homemade Leave-In Has Gone Bad
Smell is the first indicator. Any sour, fermented, or off smell that was not present in the original ingredients means the batch is compromised. Discard immediately. Visual signs include color change, separation that does not mix back with shaking, cloudiness in a formula that was originally clear, and mold spots in corners of jars.
A change in texture, becoming unusually thick or thin, also signals spoilage. Some separation is normal for oil-and-water formulas. The test is whether it recombines smoothly after shaking. If it does not emulsify back, the emulsion has broken and the batch should be discarded.
Natural Preservatives You Can Add at Home
- Vitamin E oil (tocopherol): 0.5 to 1% of recipe, extends shelf life by 2 to 3 weeks
- Rosemary oleoresin extract: 0.1 to 0.5% of recipe, effective antioxidant
- Apple cider vinegar: 1 teaspoon per cup, lowers pH and inhibits bacterial growth
- Grapefruit seed extract: 5 to 10 drops per cup, broad-spectrum antimicrobial
- Neem oil: 5 drops per cup, antifungal and antibacterial but strong smell
- Refrigeration: the single most effective preservation method for DIY formulas
10. Homemade Leave-In Conditioner for Kids with Curly Hair
Children’s scalps are more sensitive than adults. The skin’s protective barrier is thinner in children under 10. Essential oils, acids, and alcohol-containing ingredients that work safely on adult hair cause irritation, burning, and allergic reactions in young children. Every ingredient in a child’s leave-in needs to meet a higher safety standard.
Safe Ingredients for Children’s Curly Hair
Aloe vera gel is safe for children of all ages. Coconut oil, shea butter, and argan oil are all safe. Glycerin is safe in small amounts, under 3% of the recipe. Distilled water, oat milk, and chamomile tea make gentle water bases. Fragrance-free conditioners with short, simple ingredient lists work for diluted recipes.
Avoid all essential oils for children under 2. For children ages 2 to 10, use essential oils at 0.5% of the recipe maximum, which is 1 drop per tablespoon of carrier. Eucalyptus, peppermint, and camphor oils are unsafe for children under 10 regardless of concentration due to respiratory risks.
Gentle Leave-In Recipe for Toddler and Kids’ Curls
You need:
- 3 tablespoons distilled water or chamomile tea cooled
- 1 tablespoon pure aloe vera gel
- 1 teaspoon fractionated coconut oil
- Half a teaspoon raw shea butter melted
- Fragrance-free, unscented
Blend aloe and water first. Melt shea butter and stir in coconut oil. Combine both mixtures while both are at room temperature. Store in the refrigerator. Shelf life is 10 to 14 days. Apply to wet hair after bath time. Rake gently through small sections. Follow with a wide-tooth comb for detangling.
How Often to Apply Leave-In on Children’s Curly Hair
Children sweat from the scalp more frequently than adults. This activates natural oils but also attracts dirt and causes faster product buildup. Wash children’s curly hair every 5 to 7 days and apply leave-in after each wash. Do not apply leave-in between washes unless the hair feels dry. Over-application in children causes scalp congestion and itching.
For very active children or in humid climates, a light water mist without oil is enough between wash days. Mix 1 cup of distilled water with 1 teaspoon of aloe vera juice and use it as a daily refresh spray. This rehydrates without adding to buildup.
Ingredients to Avoid in Children’s Leave-In Conditioners
- Essential oils in children under 2: eucalyptus, peppermint, tea tree, camphor
- Isopropyl alcohol or SD alcohol: dries and burns sensitive scalps
- Synthetic fragrance: common allergen, linked to eczema flares in children
- Beeswax or lanolin: cause buildup and are difficult to remove from fine children’s hair
- Honey for children under 1 year old: botulism risk from raw honey
- Petroleum-based products: block the scalp’s natural oil production
11. How Often Should You Use Leave-In Conditioner on Curly Hair
More is not always better. Over-conditioning is a real problem for curly hair. It causes limpness, breakage, and scalp congestion. Understanding frequency prevents you from underdoing or overdoing moisture application.
Daily vs Weekly Application: What Works for Curly Hair
High porosity curly hair needs leave-in every wash day plus a light refresh spray between washes. It loses moisture within 24 hours in most climates. Low porosity curly hair needs leave-in on wash day only. Its cuticle holds moisture well, and additional products between washes create buildup that blocks future moisture absorption.
A simple way to test your porosity is the float test. Drop a single clean hair strand in a glass of room temperature water. If it floats for more than 3 minutes, you have low porosity hair. If it sinks within 1 to 2 minutes, you have high porosity. Medium porosity hair sinks slowly after 2 to 3 minutes.
How Weather and Climate Change Your Moisture Needs
Humidity levels directly affect how much leave-in your hair needs. In high humidity, hair absorbs moisture from the air and needs less from products. In low humidity or air-conditioned environments, hair loses moisture to the air rapidly and needs more sealing products.
In humid climates, reduce oil content in your leave-in and increase humectant content. In dry or cold climates, increase oil content and reduce water content. Curly hair routines are not fixed. They shift with seasons, travel, and indoor climate changes. Assess your hair’s moisture level weekly during seasonal transitions.
Signs You Are Over-Conditioning Your Curly Hair
Over-conditioning, also called hygral fatigue, happens when the hair shaft repeatedly swells with water and then dries. This weakens the cortex and causes a specific kind of breakage: strands that stretch excessively and then snap. The hair feels mushy when wet but breaks easily when dry.
Other signs include curls that go limp within 2 hours of styling, excessive frizz despite heavy product use, and a lack of definition that does not improve with more product. The fix is a protein treatment followed by a 2-week reduction in moisture product frequency. Reset the hair’s protein-moisture balance before resuming your normal routine.
Adjusting Your Leave-In Routine by Season
- Spring: increase humectants as humidity rises, reduce heavy butters
- Summer: switch to lightweight sprays in high humidity regions, add anti-humidity sealants
- Autumn: begin adding more occlusive oils as indoor heating starts
- Winter: use shea butter-based leave-ins, increase frequency to every wash day plus one mid-week refresh
- Travel to dry climates: carry a travel-size sealing oil to layer over your leave-in
- Travel to humid climates: use a gel-based leave-in rather than oil or butter-based formulas
12. Frequently Asked Questions About Homemade Leave-In Conditioner
These questions appear in search results, social media forums, and curly hair community groups consistently. The answers are practical and based on hair science, not anecdote.
Does a Homemade Leave-In Work as Well as Store-Bought?
Yes, in most cases. Store-bought leave-ins contain the same core ingredients, water, humectants, emollients, and occlusives, with the addition of synthetic preservatives, fragrance, and emulsifiers to improve texture and shelf life. A well-formulated DIY leave-in performs at the same level on moisture delivery and curl definition.
The advantages of DIY are control over ingredients, cost, and the ability to adjust the formula for your exact curl needs. The disadvantage is shorter shelf life without commercial preservatives. If you travel frequently or prefer low-maintenance hair care, commercial leave-ins offer consistency that DIY formulas cannot always match.
Can You Apply Homemade Leave-In Conditioner on Dry Hair?
You can, but results are significantly weaker. Leave-in conditioners are water-based and designed to penetrate a wet, open hair shaft. Dry hair has a closed or flat cuticle. Water-based products sit on top of dry hair rather than absorbing. They evaporate within 30 minutes without delivering meaningful hydration.
If you apply leave-in to dry hair for a refresh, mist the hair with water first until it is damp but not dripping. This opens the cuticle enough to allow product absorption. Apply the leave-in immediately after misting, before the water evaporates.
How Long Does Homemade Leave-In Last on the Hair
A well-applied leave-in with a proper oil sealant lasts 24 to 48 hours on most curl types. High porosity hair will feel dry again within 24 hours. Low porosity hair may retain moisture for 3 to 4 days. Refreshing with a light water mist extends the leave-in’s effectiveness without reapplying the full product.
Common Homemade Leave-In Problems and How to Fix Them
- Hair feels greasy: reduce oil content by half in your next batch
- Curls are not clumping: increase water content and apply to wetter hair
- Product dries white or flaky: check aloe vera for alcohol additives, switch brands
- Recipe separates instantly: add a natural emulsifier like BTMS-50 or cetyl alcohol
- Scalp itches after use: check for an essential oil reaction, remove from recipe
- Curls are flat and limp: reduce heavy butters, switch to a lightweight spray formula
- No change in dryness: your hair may need protein before moisture can absorb properly
Which Homemade Recipe Is Right for You?
| Hair Type | Best Recipe | Key Ingredient |
|---|---|---|
| Type 2 wavy, fine | Lightweight spray | Grapeseed oil, aloe juice |
| Type 3, medium porosity | Aloe and coconut oil | Fractionated coconut oil |
| Type 3, high porosity | 3-ingredient with protein | Rice water, argan oil |
| Type 4 coils | Shea butter leave-in | Raw shea butter |
| Damaged or treated | Protein rice water spray | Rice water, glycerin |
| Children’s curly hair | Chamomile and aloe | Fractionated coconut oil |
Start with one recipe. Use it for four wash days before changing anything. Hair responds to consistency, not variety. Once your baseline moisture level improves, adjust for season, climate, or new hair goals.