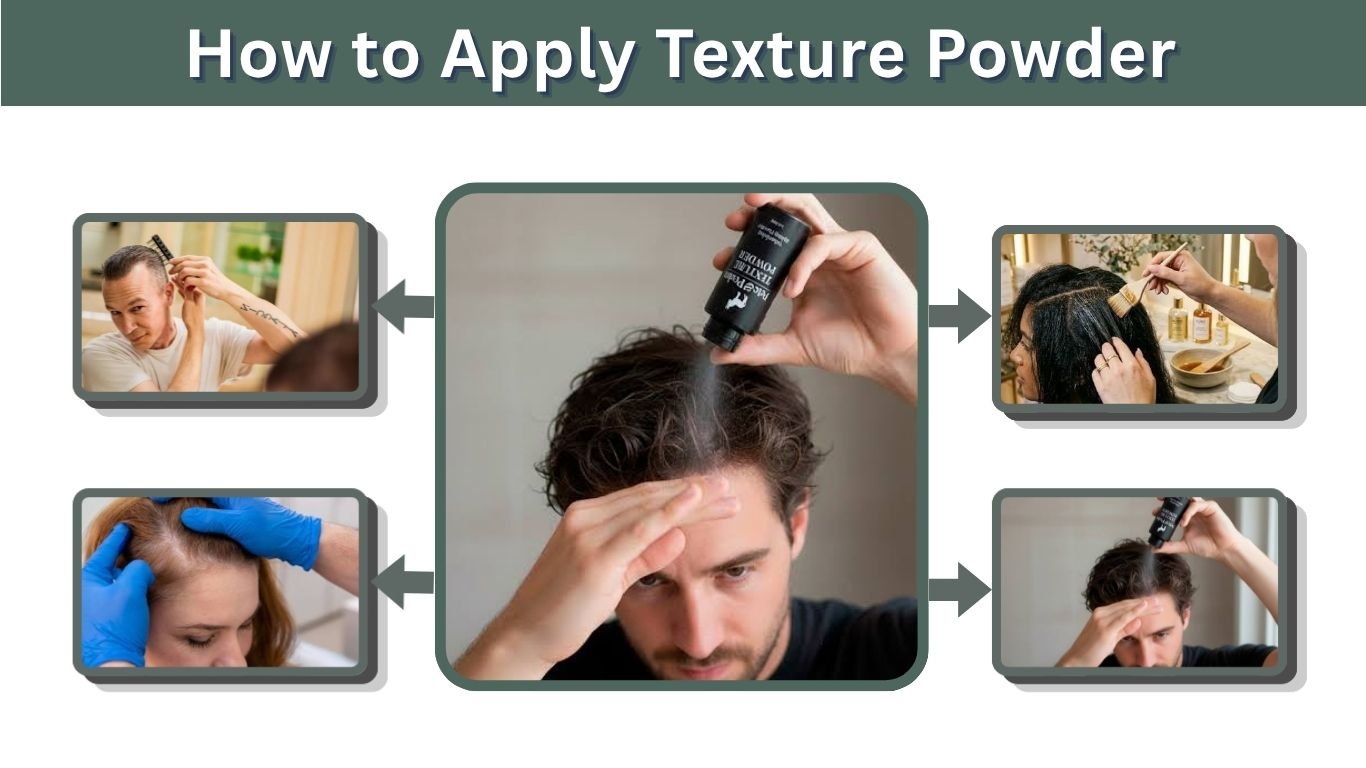
How to Apply Texture Powder: Complete Guide for All Hair Types
Updated: August 23, 2026 | Author: Philip
Texture powder is one of the most versatile styling products available, yet many people struggle to apply it correctly. Whether you’re looking to add grip to your braids, create volume at the roots, enhance natural texture, or achieve a beachy wave effect, texture powder can be your secret weapon. This comprehensive guide covers everything you need to know about applying texture powder safely and effectively across all hair types, climates, and styling needs.
Key Takeaway: Texture powder works by coating individual hair strands and increasing friction between them, creating grip and volume. The key to application is starting with less product, using the right technique for your hair type, and building up gradually to avoid a chalky or overly stiff result.
Quick Navigation
- Section 1: Understanding Texture Powder Basics
- Section 2: Essential Tools and Preparation
- Section 3: Step-by-Step Application Methods
- Section 4: Texture Powder by Hair Type
- Section 5: Techniques for Different Styles
- Section 6: Climate and Humidity Considerations
- Section 7: Building Volume Without Damage
- Section 8: Mixing and Blending Techniques
- Section 9: Advanced Application Tips
- Section 10: Safety and Potential Side Effects
- Section 11: Removal and Hair Health
- Section 12: Product Comparison and Selection
1. Understanding Texture Powder Basics: What It Is and How It Works
What Texture Powder Actually Is
Texture powder is a fine, talc-free (or talc-based) cosmetic product designed to coat hair strands and create friction. Most modern texture powders contain ingredients like starch derivatives, silica, or mineral-based compounds that cling to individual hair strands and increase their grip on each other. Unlike dry shampoo, which primarily absorbs oil, texture powder’s primary function is to create volume, grip, and textural interest.
The powder particles are extremely light and microscopic, allowing them to penetrate into the hair shaft structure without weighing down your hair. When applied correctly, they create a matte finish and increase the friction between strands, which prevents them from sliding against each other.
The Science Behind Texture Powder’s Effectiveness
Hair strands are naturally smooth, which is why slicked hairstyles are possible but also why some people struggle with hold. Texture powder roughens the surface of each strand microscopically, creating resistance. This increased friction is what allows braids to grip tighter, styles to hold longer, and fine hair to appear fuller.
The effectiveness depends on several factors: the size of the powder particles, the density of application, and your hair’s natural texture and porosity. Fine, smooth hair typically needs less product to feel the effects, while thick, coarse, or highly textured hair may need more coverage.
Texture Powder vs. Dry Shampoo: Key Differences
While people often use these terms interchangeably, they serve different purposes. Dry shampoo absorbs sebum (natural hair oils) and is designed for extending time between washes. Texture powder, by contrast, is meant to add grip and volume regardless of your hair’s oil level. You can use texture powder on freshly washed hair, whereas dry shampoo works better on hair with natural oils present.
When to Use Texture Powder vs. Alternative Products
Texture powder is ideal when you need grip for styling (braids, buns, twists), when you want to add volume, or when you’re working with slippery strands. It’s less ideal if you’re trying to absorb excess oil (use dry shampoo instead) or if you’re aiming for a sleek, polished finish (which texture powder would compromise).
2. Essential Tools and Preparation: Getting Ready to Apply
Tools That Make Application Easier
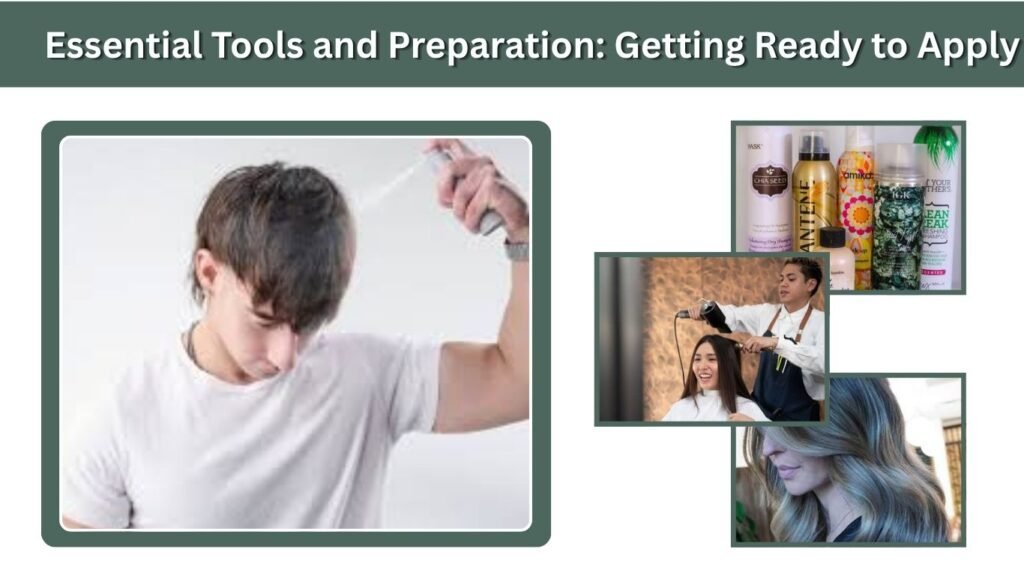
While texture powder can technically be applied with your fingers, certain tools make the process cleaner, more controlled, and more effective. A powder brush or fluffy makeup brush allows for more precise application and better distribution. Some people use old mascara wands or clean eyebrow brushes for targeting specific sections. A teasing brush (also called a backcombing brush) helps work the powder into the hair and create volume simultaneously.
A spray bottle with water is helpful for locking in texture powder on tight braids or twists. A fine-tooth comb can help distribute the powder evenly through longer strands. Sectioning clips prevent you from applying the powder multiple times to the same section.
Pre-Application Hair Preparation Steps
For best results, start with clean, dry hair (or at least thoroughly dried hair if you’ve just washed it). Damp hair will cause the powder to clump and may not distribute evenly. If you’re applying to second-day hair, a light dry shampoo followed by brushing will remove excess oil and give you a cleaner canvas for the texture powder.
Detangle your hair completely before application. Knots and tangles trap powder unevenly and can make removal difficult later. Using a wide-tooth comb on damp hair before blow drying, then a paddle brush on dry hair, ensures you start with a smooth foundation.
Style your hair roughly into your intended final shape before applying powder. It’s easier to work the powder through hair that’s already in the general structure you want (braids, twists, waves, etc.) rather than applying it to completely loose hair and then styling.
Workspace Setup and Application Environment
Apply texture powder in a well-lit area where you can see both your hands and the back of your head (use a mirror or phone camera to check). Powder can be dusty, so avoid applying over carpeted areas if possible. A bathroom with good ventilation is ideal, or you can apply outdoors on a calm day to avoid powder dispersing through your home.
Have paper towels or a lint roller nearby for cleanup. Texture powder can leave residue on your hands, face, and clothing, so being prepared makes the process less messy.
Quantity Guidelines: How Much to Use
Start with approximately one quarter of a teaspoon for short hair, one half teaspoon for medium-length hair, and up to one full teaspoon for long or very thick hair. This is a starting point. It’s always better to apply less and add more than to apply too much initially. Excess powder creates a chalky appearance and makes removal difficult.
3. Step-by-Step Application Methods: The Foundation
The Finger Application Method
The simplest application method requires no tools. Place a small amount of powder (roughly the size of a grain of rice) on your fingertips. Rub it between your fingers to warm it slightly and break up any clumps. Working in a small section of hair, rub your fingers against the hair strands, focusing on the roots and mid-lengths. The goal is to distribute the powder along individual strands rather than depositing it all in one spot.
Work methodically through your hair in sections, starting at the back and moving toward the front. After applying to each section, use a teasing brush or your fingers to work the powder through and blend it. This method gives you the most control and is ideal for detailed work like braids or small sections.
The Brush Application Method
Pour a small amount of powder into a shallow dish or onto a piece of cardboard. Dip a fluffy makeup brush or powder brush into the product. Tap off excess (important: you want a light coat on the brush, not heavy saturation). Apply the powder to your hair by brushing along the length of the strands, paying special attention to the roots where volume is most needed.
This method covers larger areas more quickly than the finger method and produces a more even distribution. It’s particularly effective for creating volume throughout the full length of the hair. Make multiple light passes rather than one heavy pass for better blending.
The Spray Method (for Tight Styles)
For braids, twists, buns, and other tight protective styles, apply the powder, then lightly mist with water to help it adhere and prevent shifting. Use a spray bottle set to a fine mist (like you would for setting makeup). This locks the powder into place and creates a more cohesive texture. This method works exceptionally well for styles that will move around throughout the day.
The Targeted Precision Method
For specific areas where you need maximum grip (like at the base of a bun, where braids meet your scalp, or along the perimeter where baby hairs stick out), use an old mascara wand or eyebrow brush. Dip the brush into powder, tap off excess, and apply directly to problem areas. This surgical approach prevents over-application while ensuring the areas that need the most hold get adequate coverage.
4. Texture Powder by Hair Type: Customized Approaches
Fine and Thin Hair
Fine hair requires a lighter touch. Use half to one quarter of your normal quantity, and focus application on the roots where volume is most beneficial. The powder will have more visible effect on fine hair because individual strands are thinner and respond more dramatically to the friction. Fine hair can look weighed down or even dull if over-applied with texture powder, so apply gradually and assess the effect before adding more.
Fine hair benefits from the brush method over the finger method, as a brush distributes the powder more thinly and evenly. Work through your hair with a teasing motion as you apply, which creates volume simultaneously with powder application. For fine hair styling braids, twists, or buns, use the spray method to ensure the powder stays in place without slipping due to the hair’s natural smoothness.
Thick and Coarse Hair
Thick hair can handle more texture powder because the volume and weight of the individual strands support more product without becoming chalky or dusty. You may need up to one and a half teaspoons for very thick, long hair. Coarse hair’s naturally rougher texture means the powder will blend in more seamlessly and look less visible.
For thick hair, the finger method or teasing brush method works well because you need to work the powder down into the denser hair mass. Apply in larger sections than you would for fine hair, and don’t hesitate to use more product. Thick hair is forgiving and actually benefits from generous texture powder application for maximum grip and style hold.
Curly and Coily Hair
Textured hair (curls, coils, waves) typically needs less texture powder because the natural texture already provides grip. However, when used strategically, texture powder can define curls and extend style duration. Apply to the roots for volume, being careful not to disrupt your curl pattern. Using the spray method after application helps lock the powder into your curl structure without disturbing the curl definition.
For highly coily hair (4a, 4b, 4c textures), test texture powder carefully first. Some people find it dries out their curls or causes buildup over time. If using it, apply minimally and ensure thorough removal at wash time. For loose curls or waves, standard application methods work fine.
Straight and Smooth Hair
Straight hair benefits most from texture powder because smooth strands naturally slide against each other. Texture powder creates the friction needed to hold styles that would otherwise slip. Standard application amounts work well. Apply the powder, tease gently to work it in and create volume, and you’ll see dramatic improvement in grip and hold.
Straight hair is forgiving regarding texture powder application because the powder blends in and looks natural. You can be more generous with application without worrying about a chalky appearance.
5. Techniques for Different Styles: Customized Application
Applying Texture Powder for Braids
Braids are one of the most popular uses for texture powder because it keeps strands from slipping and extends braid longevity. Apply the powder before braiding by working it through the section of hair you’ll braid. Part off the section, apply powder with a brush or fingers, then work it through with a teasing motion. You can also apply after braiding by working the powder along the braid itself, focusing on where strands meet.
For more secure braids, apply powder, then lightly mist with water to lock it in place. This prevents the powder from shifting as you braid and keeps your braids tight longer. For cornrows and detailed braiding styles, the spray method after completion is particularly effective.
Applying Texture Powder for Buns and Updos
Apply texture powder to hair before creating your bun or updo. Work it through the entire length, paying special attention to the roots and the hair section you’ll wrap around the bun base (where grip is most essential). Once your bun is formed, you can apply additional powder directly to the underside where the hair twists and locks together for extra security.
The spray method works exceptionally well for buns. Apply powder, style your bun, then lightly mist to lock everything in place. This prevents flyaways and keeps the bun secure for hours.
Applying Texture Powder for Twists
Two-strand twists, three-strand twists, and flat twists all benefit from texture powder applied before twisting. Part off your section, apply powder with a brush, working it through thoroughly, then twist. The powder increases the friction between strands, creating a tighter, more defined twist that holds its shape longer.
For already-completed twists, you can apply powder directly along the twist using a targeted brush method. This adds definition and improves hold without dismantling your style.
Applying Texture Powder for Wave and Curl Definition
To enhance natural waves or create beachy waves with a curling iron, apply texture powder after styling. Wave your hair with a curling iron or braiding method, then apply powder to the finished waves by brushing along the wave pattern. This enhances definition, adds shine, and extends the wave’s hold throughout the day.
For spray-in texture products, spray them onto the wave, wait for them to dry, then apply texture powder on top for maximum definition and hold. This layered approach creates the best result.
Texture Powder Alternatives Comparison Table
| Alternative Product | Primary Function | When to Use Over Texture Powder |
|---|---|---|
| Dry Shampoo | Oil absorption, freshening | When hair is oily and needs to extend time to next wash |
| Sea Salt Spray | Beachy texture, hold | For wave and curl definition with moisture |
| Volumizing Mousse | Light hold and volume | When you want volume without powder’s coating effect |
| Hairspray | Style hold, finishing | To lock completed styles in place (layer over texture powder) |
| Velcro Rollers + Blow Dryer | Natural volume via heat styling | When you want volume without product application |
6. Climate and Humidity Considerations: Environmental Adjustments
Hot and Humid Climate Application
In hot, humid environments, texture powder’s effectiveness decreases because moisture in the air interferes with the friction created by the powder. Humidity can cause hair to swell slightly and reactivate natural oils, both of which reduce the powder’s grip. In these climates, apply slightly more texture powder than you would in dry conditions, and use the spray method to help lock it in place.
Indoor air conditioning can help offset humidity’s effects. If you’ll be indoors most of the day, apply texture powder in the morning before leaving your air-conditioned home. If you’ll be outdoors in humid conditions, reapply texture powder mid-day for best results.
Dry and Low-Humidity Climate Application
Dry climates are ideal for texture powder application because low humidity means the powder’s effectiveness lasts longer. You can use standard amounts and may find the powder lasts even longer than expected. The trade-off is that dry climates can make your hair more prone to static electricity, which texture powder slightly amplifies. Use anti-frizz products in addition to texture powder if this is an issue.
Seasonal Variations in Application
Summer typically brings higher humidity and heat, requiring more texture powder and more frequent reapplication. Spring and fall (depending on your location) offer moderate conditions. Winter in cold climates means indoor heating, which dries the air, but also colder outdoor temperatures. Cold air is favorable for texture powder’s grip, but winter hat-wearing can disrupt your style.
Adjust your application strategy seasonally. In summer, apply more generously and consider reapplying before afternoon activities. In winter, standard application usually suffices, but indoor heating may require application adjustments.
Travel Considerations: Climate Changes
If you’re traveling from a humid climate to a dry one or vice versa, adjust your texture powder application accordingly. Pack your texture powder in checked luggage or in a container that meets TSA requirements. Humidity changes can take 24-48 hours for your hair to fully adjust, so increase texture powder application for the first few days after arrival in a new climate.
7. Building Volume Without Damage: Healthy Techniques
The Teasing Method for Maximum Volume
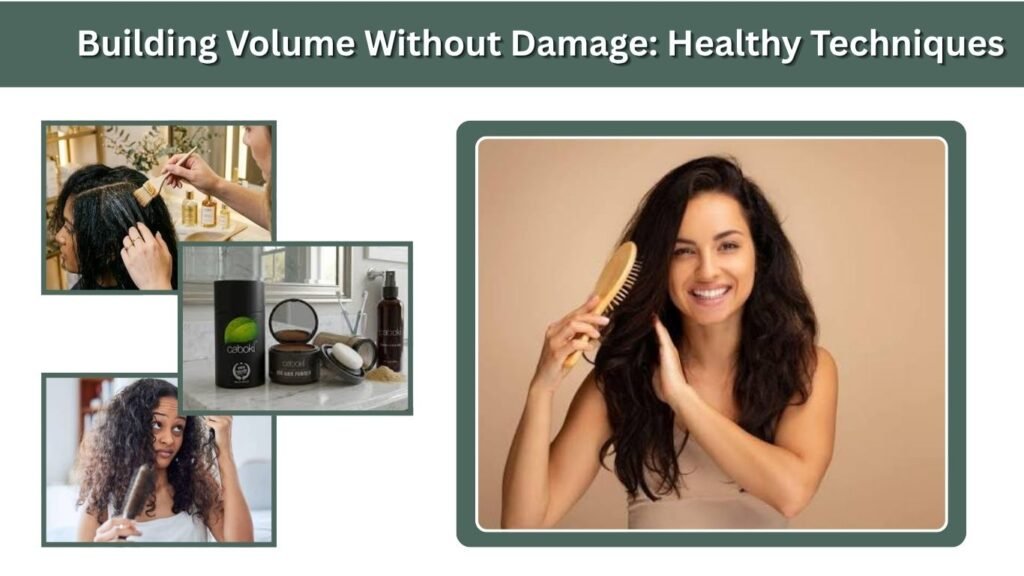
The most effective way to build volume with texture powder is to combine it with gentle teasing. Apply texture powder to a section, then use a teasing brush or fine-tooth comb to backcomb gently at the roots. This creates a volume base. Do this lightly and carefully to avoid creating tangles that cause breakage during removal.
Work from the ends toward the roots, making small strokes with the teasing brush. Once you’ve created a gentle tease, smooth over the outer layer of the section so it looks intentional rather than matted. The texture powder you’ve already applied will blend in and hold the volume in place.
Root Lifting Without Breakage
Applying texture powder at the roots and then lifting that section (by clipping, pinning, or blow drying at the roots) creates volume that lasts all day. Apply powder to the root area, then blow dry your hair with your head flipped upside down. The combination of texture powder and heat creates lasting lift without the tension that comes from tight styling.
This method works particularly well for fine hair that needs volume but can’t handle heavy styling techniques. Texture powder replaces some of the volume-creating work that might otherwise come from blow-drying alone.
Strategic Placement for Maximum Effect with Minimum Product
You don’t need to apply texture powder to your entire head for effective results. Focus on the roots where volume matters most, the underside where it creates grip, and problem areas where your style tends to slip. This targeted approach uses less product, which means easier removal and less potential for buildup or dryness.
Map out your hair mentally: roots, underside of bun or braid base, any areas that tend to slip. Apply texture powder only to these areas, and you’ll achieve better results with less product than if you coated your entire head.
Protecting Hair Health: Application Best Practices
Never apply texture powder to already-dry, stressed hair without addressing the underlying damage first. Texture powder isn’t a substitute for proper conditioning and hair care. If your hair is dry or brittle, deep condition before using texture powder. If you use texture powder frequently, increase your conditioning routine to compensate for the slightly drying effect of the product.
Apply texture powder to clean, healthy hair. If you notice breakage increasing or your hair becoming drier, reduce application frequency (use it 3 times weekly rather than daily) or use less product.
8. Mixing and Blending Techniques: Getting Professional Results
The Initial Blend Phase
After applying texture powder to a section, don’t immediately move to styling. Spend 30 seconds to a minute working the powder through the hair. Use a teasing brush, your fingers, or a paddle brush to distribute the product evenly. This blending phase is crucial: it prevents powder from settling in one spot and looking chalky, and it ensures the product coats all the hair strands evenly.
Blend by brushing through the section in multiple directions: down the length of the hair, against the grain (to check for even coverage), and along the direction of your intended style.
Working Powder Through Different Hair Lengths
For hair longer than shoulder-length, focus your initial application on the roots and mid-lengths. Work the powder down toward the ends with a brush, but don’t saturate the ends. Ends don’t need as much texture powder and will look drier if over-applied. Avoid applying powder to the very last inch of your hair.
For short hair, apply more evenly throughout since there’s less hair to distribute the product. For pixie cuts or very short styles, focus on the roots and anywhere you want grip for styling.
Blending to Avoid a Chalky Appearance
The number-one sign of over-applied texture powder is a chalky, dusty appearance. To avoid this, apply less product and blend more thoroughly. If you’ve already over-applied and see chalk, don’t add more. Instead, brush firmly through the affected area with a paddle brush or fine-tooth comb. This often redistributes the powder better and reduces the chalky look.
Some chalky appearance is normal and will fade as you wear your style and your hair naturally oils slightly. However, if it’s immediately visible, you’ve applied too much.
Creating Seamless Transitions Between Sections
When applying texture powder section by section (which is standard for most styles), blend the edges where sections meet. After completing two adjacent sections, run your brush through both to create a seamless transition. This prevents visible lines in your hair and ensures even distribution of the texture powder throughout.
9. Advanced Application Tips: Professional Techniques
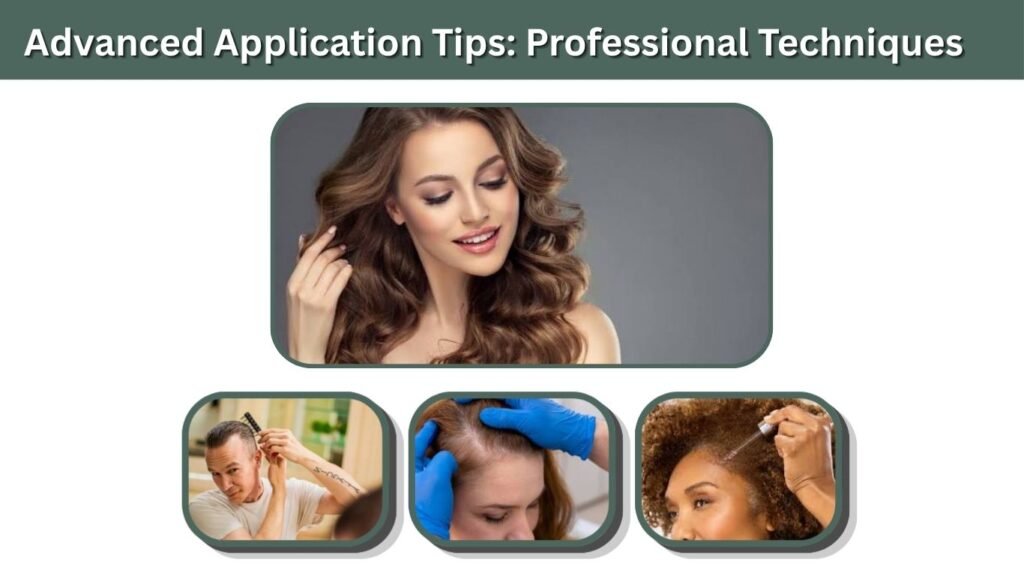
Combination Approach: Texture Powder Plus Styling Products
Texture powder works best when combined with other styling products. Apply dry shampoo first to address oil and add some grip, then apply texture powder for additional texture and volume. Layer a light hairspray on top to lock everything in place. This three-step approach creates the most professional, longest-lasting results.
Alternatively, apply texture powder, style completely, then use a texture-enhancing spray (such as sea salt spray or beach wave spray) on top for additional grip and texture. The combination of products works synergistically to create better results than any single product alone.
Customizing Application Based on Hair Density
Individual hair density (the number of hairs on your scalp) is different from hair thickness (the width of individual strands). High-density hair with many hairs can handle more texture powder because the powder is distributed across more strands. Low-density hair (fewer total hairs) should use less texture powder because the same amount of product is distributed across fewer strands, potentially looking heavier or more chalky.
To assess your hair density: if you can easily see your scalp when you part your hair, you have low to medium density. If your scalp is largely hidden by hair, you have medium to high density. Adjust your texture powder application accordingly.
Creating Texture in Fine or Limp Hair
For fine hair that tends to lie flat, apply texture powder at the roots, then tease gently while the powder is still absorbing. The combination creates maximum lift with minimum product. Follow with a light hairspray to set. This works better than trying to create volume through styling alone.
For limp hair that doesn’t hold styles well, texture powder is a game-changer. Apply generously (for fine hair, this still means moderately), blend thoroughly, and allow time for the powder to fully absorb before styling. The grip created often makes styles that previously didn’t last all day suddenly hold perfectly.
Professional Styling Tips from Hairstylists
Professional stylists apply texture powder in thin layers rather than one thick layer, allowing better blending and a more natural finish. They often use a brush for precision rather than fingers for speed. They section hair methodically, applying to one section at a time, then styling that section before moving to the next. This ensures even application and prevents forgetting sections.
Professionals also prep their workspace with paper towels or a cloth nearby for quick cleanup, and they apply in good lighting so they can see exactly what they’re doing. These professional practices lead to better results than rushing through application.
10. Safety and Potential Side Effects: Understanding Risks
Is Texture Powder Safe for Regular Use?
Yes, texture powder is generally safe for regular use when applied correctly and removed properly. However, “regular” means 3 to 5 times weekly for most people, not daily. Daily application can build up on the scalp and hair, potentially causing dryness or irritation. If you use texture powder daily, deep condition weekly and shampoo thoroughly with a chelating shampoo monthly to prevent buildup.
Modern texture powders are talc-free (talc has been associated with health concerns), making them safer than older products. Check your product label to confirm it’s talc-free. Silica-based and starch-based powders are safe options.
Buildup and How to Prevent It
Over time, repeated texture powder application can cause buildup on the hair shaft. This manifests as dull, dry-looking hair that doesn’t hold moisture well. Prevention is easier than treatment: don’t apply texture powder daily, and shampoo thoroughly on wash days to remove all residue.
If you notice buildup, use a clarifying shampoo or chelating shampoo specifically formulated to remove product residue. Follow with a deep conditioner to restore moisture. Once buildup is cleared, resume normal texture powder use at a reduced frequency if desired.
Scalp Irritation and Sensitivity
Some people experience scalp irritation from texture powder, especially if they have a sensitive scalp or scalp conditions like dandruff or psoriasis. If this occurs, avoid applying texture powder directly to the scalp area. Apply it only to the hair lengths, starting about one inch away from the roots. This still provides grip and volume while avoiding scalp irritation.
If irritation persists, discontinue use and consult a dermatologist. Choose a hypoallergenic texture powder brand formulated for sensitive scalps.
Potential for Over-Drying Hair
Because texture powder coats the hair shaft slightly, regular use can make hair appear or feel drier than usual. This doesn’t mean the powder damages hair, but it does mean that heavy or daily use requires compensatory moisture treatment. Condition deeply once weekly if using texture powder more than 3 times per week. Use a leave-in conditioner or hair oil on damp ends after shampooing.
If your hair is already dry or damaged, reduce texture powder frequency to 2 to 3 times weekly and increase deep conditioning to twice weekly.
Respiratory Considerations
When applying any powder product, fine particles can become airborne and potentially irritate respiratory systems, particularly in people with asthma or allergies. Apply texture powder in a well-ventilated area, outdoors if possible. Avoid applying over carpeted surfaces where powder might scatter and become an inhalation risk. People with asthma should be particularly cautious and may prefer liquid texture products or spray applications instead of powder.
11. Removal and Hair Health: The Cleanup Phase
Proper Texture Powder Removal Techniques
Thorough removal is as important as proper application. Start by brushing your hair thoroughly with a paddle brush or wide-tooth comb to physically remove as much loose powder as possible. This removes the bulk of the product before shampooing, reducing the amount that needs to be washed out.
Shampoo with your regular shampoo, but massage the scalp and hair thoroughly to ensure you’re removing all the powder. You may need to shampoo twice to remove all residue. Focus on the roots and any areas where you applied the most powder. A chelating shampoo once monthly ensures complete removal of any buildup.
Conditioning After Texture Powder Use
Always condition thoroughly after removing texture powder. The coating effect of the powder means your hair’s moisture barriers may be slightly compromised. Deep conditioning after texture powder use restores moisture and keeps hair healthy. Use a moisturizing conditioner (not protein-based, unless your hair is damaged) to rebalance moisture levels.
If you use texture powder regularly (more than twice weekly), incorporate a weekly deep conditioning treatment into your routine. This prevents the dryness that can result from frequent powder use.
Signs Your Hair Needs a Break from Texture Powder
If you notice your hair becoming progressively drier, duller, or less manageable despite good conditioning habits, take a break from texture powder for 2 to 4 weeks. This allows buildup to fully clear and your hair’s natural moisture to restore. Resume use at a lower frequency (every other day rather than daily) once your hair recovers.
Other signs to watch: difficulty untangling, increased breakage, or hair that feels straw-like or brittle. These indicate your hair is too dry for frequent texture powder use.
Healthy Hair Care for Texture Powder Users
Establish a solid foundation for texture powder use: regular clarifying shampoos (monthly), weekly deep conditioning, minimal heat styling, and protective styling practices. Hair that’s already healthy and well-moisturized tolerates texture powder better than hair that’s dry or damaged. Think of texture powder as one tool in a larger hair care routine, not as a substitute for proper conditioning and care.
Use appropriate shampoos and conditioners for your hair type (not generic products) and always condition the mid-lengths and ends, even if you apply texture powder only to the roots. This comprehensive approach prevents the dryness associated with frequent texture powder use.
12. Product Comparison and Selection: Choosing the Right Texture Powder
Understanding Different Texture Powder Formulations
Texture powders vary in their base ingredients, particle size, color, and performance. Silica-based powders are lightweight and work well for fine hair. Starch-based powders (derived from tapioca or rice) are gentle and less likely to cause buildup. Some premium formulations include nourishing ingredients like silk proteins or keratin. Understanding these differences helps you choose a product that matches your hair’s needs.
Color options range from translucent (invisible on all hair colors) to tinted variations for brunettes, blondes, and grays. Translucent is the most versatile. Particle size affects how visible the powder is and how effectively it grips. Finer particles create a more invisible finish but may require slightly more product for the same effect as larger particles.
Texture Powder Comparison Table: Popular Brands
| Brand/Product | Best For | Key Features |
|---|---|---|
| Bumble and bumble Thickening Full Form Mousse (dry texture option) | Fine hair, all textures | Lightweight, volumizing, won’t weigh down |
| Oribe Dry Texturizing Spray | All hair types, professional use | Spray application, matte finish, durable hold |
| Living Proof Dry Volume Blast | Fine to medium hair | Lightweight spray, doesn’t flake, buildable |
| Tresemmé Dry Shampoo plus Texture | Budget option, casual use | Affordable, absorbs oil while adding texture |
| Batiste Texturizing Dry Shampoo | Oil absorption with texture, medium hair | Dual purpose, tinted options available |
Choosing the Right Product for Your Hair
Consider your hair type, texture, and primary use when selecting a texture powder. Fine hair benefits from lightweight, talc-free powders that won’t weigh it down. Thick hair can tolerate heavier formulations. If you have a sensitive scalp, choose hypoallergenic options or ones with soothing ingredients. If you use texture powder frequently, choose quality brands that minimize buildup.
Budget also matters. Professional salons use higher-end brands that may perform better, but drugstore options work for occasional use. If you’re testing whether texture powder is right for you, start with an affordable option. Once you know you’ll use it regularly, investing in a better product is worthwhile.
Spot Testing and Patch Testing
Before fully committing to a new texture powder, test it on a small hidden section first. This identifies potential reactions, color-matching issues (if using tinted powder), or undesirable texture before applying to your entire head. Apply a small amount, wait 24 hours, and assess how it affects your hair and scalp.
If you have a history of product sensitivity, do a patch test on your scalp 24 hours before full application. This reduces the risk of allergic reactions or irritation that could ruin your hairstyle plans.
Frequently Asked Questions About Texture Powder Application
Can I Apply Texture Powder to Wet Hair?
No. Texture powder works by coating dry hair strands. On wet or damp hair, the moisture prevents the powder from adhering and distributing evenly. The powder will clump instead of creating a fine, textured coating. Always apply texture powder to completely dry hair.
How Long Does Texture Powder Last in Hair?
In dry climates, texture powder can last 12 to 24 hours of wear. In humid environments, the duration is typically 6 to 12 hours. Once the powder starts to shift or become less effective, you can reapply. Most people don’t need to reapply during a single day, but anyone in very humid climates might find midday reapplication helpful for maintained grip.
Does Texture Powder Work on Hair Extensions or Wigs?
Yes, texture powder works on extensions and wigs made from human hair. For synthetic wigs or extensions, test carefully first as some synthetic fibers respond differently to texture powder. Apply the same way you would to natural hair, blend thoroughly, and remove by brushing and gentle shampooing.
Can Children Use Texture Powder?
Yes, children can use texture powder for styling purposes. Choose child-safe, hypoallergenic products and apply sparingly. Supervise application and removal to ensure the child doesn’t inhale the powder. The spray form is safer than powder form for children because it reduces inhalation risk.
Is Texture Powder the Same as Volumizing Powder?
Texture powder and volumizing powder are closely related but slightly different. Volumizing powder emphasizes creating fullness and lift, while texture powder emphasizes adding grip and texture. In practice, they’re very similar and often the same product marketed differently. Both work by coating strands and creating friction.
What is the Best Time of Day to Apply Texture Powder?
Apply texture powder immediately before the activities when you need maximum grip and volume. For most people, this is in the morning before leaving the house. If your style tends to fall or lose grip in the afternoon, applying before those activities is also effective. Texture powder is not typically an overnight product; you’ll wash it out before sleeping.
Conclusion: Mastering Texture Powder Application
Texture powder is a simple yet transformative styling tool when applied correctly. The key to success is starting with less product than you think you need, blending thoroughly, and adjusting your technique based on your hair type and intended style. Whether you’re creating tight braids, adding volume to fine hair, or defining waves, texture powder offers a chemical-free, reversible way to enhance your hair’s appearance and hold.
Remember that texture powder is one tool in a larger hair care toolkit. Its effectiveness improves when combined with other styling products, a solid basic hair care routine, and healthy hair practices. Regular users benefit from monthly clarifying treatments and weekly deep conditioning to prevent buildup and dryness. Occasional users can enjoy texture powder’s benefits with minimal maintenance.
As with any hair product, results vary based on individual hair characteristics, climate, and application technique. The techniques and guidance in this comprehensive guide provide a strong foundation for experimenting and finding the methods that work best for your unique hair. Start with the basic application methods, assess the results, and adjust based on your observations.
Ready to try texture powder? Start with a small amount on a single braid or style section. As you become comfortable with application and removal, expand to more complex styles and fuller applications. Within a few uses, you’ll develop an intuitive feel for the right amount of product and technique for your hair.

- 10 Best Hair Oil For Overnight Treatment Buyer Guide 2026 - October 26, 2026
- 10 Best Hair Oil For One Year Old Baby Buyer Guide 2026 - October 26, 2026
- 10 Best Hair Oil For Oily Skin Buyer Guide 2026 - October 26, 2026