15 Natural Conditioner Recipes for Healthier, Shinier Hair
Creating your own hair conditioner at home offers numerous advantages over commercial products: significant cost savings, complete control over ingredients, elimination of harsh chemicals, and the ability to customize formulations for your specific hair needs. Whether you have straight, wavy, curly, fine, thick, or normal hair, there’s a homemade conditioner recipe that will work perfectly.
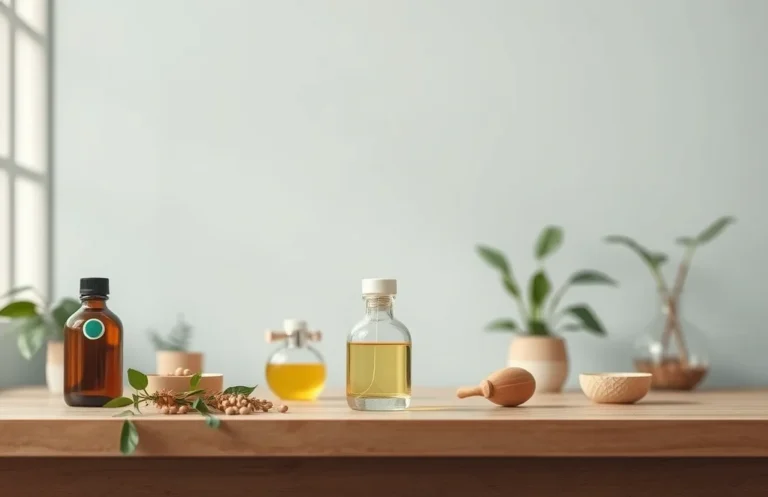
This comprehensive guide presents fifteen proven recipes for making normal hair conditioner, each designed to address different needs while maintaining simplicity and accessibility. With ingredients you likely already have in your kitchen, you can create salon-quality conditioning treatments for just a fraction of commercial costs.
1. Normal Hair and Basic Conditioner Principles

Before diving into specific recipes, it’s essential to understand what makes a good conditioner and what constitutes normal hair.
What Defines Normal Hair Type
Normal hair is characterized by a healthy balance of moisture and oil production, healthy shine, good elasticity, minimal frizz, and natural strength. Normal hair isn’t overly oily at the roots or dry at the ends like combination hair. It doesn’t have the extreme texture of curly hair or the fragility of fine hair. Normal hair is resilient, holds styles reasonably well, and generally requires minimal specialized care. Most people can achieve normal hair health with basic conditioning practices and suitable products. Understanding your hair’s baseline helps you choose conditioner recipes that maintain this optimal balance.
The Science Behind How Conditioners Work
Conditioners work through several mechanisms. Emollients (typically oils) coat the hair shaft, smooth the cuticle, and add moisture. Humectants (like glycerin or honey) draw moisture from the environment and deeper scalp layers into the hair. Proteins fill gaps and strengthen damaged areas. Antioxidants protect from environmental stress. A well-formulated conditioner combines these elements to coat, hydrate, and strengthen hair simultaneously. Understanding these mechanisms helps you appreciate why certain ingredients are included in specific recipes and how they work together.
Ingredients That Make Up a Good Conditioner Base
Every good conditioner needs several key components. A carrier oil base (coconut, argan, jojoba) provides moisture and protective coating. A water component (distilled water or herbal infusion) provides hydration and liquid consistency. An emulsifier (aloe vera gel, honey, lecithin) allows oils and water to blend smoothly. Optional proteins (egg, yogurt, coconut milk) add strength. Optional humectants (glycerin, honey) draw additional moisture. Optional essential oils provide fragrance and additional benefits. These components combine in various proportions to create different conditioner types for different hair needs.
Why Homemade Conditioners Outperform Commercial Products
Commercial conditioners often contain silicones that coat hair temporarily but build up over time, preventing genuine moisture penetration. Many include sulfates, parabens, and synthetic fragrances that can irritate scalp or cause allergic reactions. Marketing claims often promise more than the products deliver. Homemade conditioners, by contrast, use pure ingredients that genuinely nourish hair. They cost significantly less—typically $2-5 per batch versus $15-40 for commercial products. You control every ingredient, eliminating anything you wish to avoid. Most importantly, natural ingredients don’t build up and allow your hair’s natural healing processes to work optimally.
2. Essential Ingredients for Homemade Hair Conditioner

Understanding the ingredients available allows you to create countless variations.
Carrier Oils: The Foundation of Every Conditioner
Carrier oils are the primary moisturizing agents in homemade conditioners. Coconut oil provides protein-like conditioning and has antimicrobial properties. It’s solid at room temperature but melts easily when warmed. Argan oil is rich in vitamin E, antioxidants, and essential fatty acids, making it ideal for shine and protection. Jojoba oil closely mimics natural scalp sebum and penetrates easily without heaviness. Olive oil is affordable, nourishing, and provides squalene for conditioning. Almond oil contains B vitamins and magnesium for strength and shine. Avocado oil is deeply nourishing and packed with nutrients. Grapeseed oil is lightweight and suitable for all hair types. Sesame oil has anti-inflammatory properties and adds strength. Sweet almond oil provides gentle conditioning. Camellia oil (tea seed oil) adds shine without greasiness.
Water-Based Components and Hydrating Agents
Water is the fundamental hydrating component in any conditioner. Distilled water is the pure baseline. However, herbal infusions provide additional benefits. Chamomile tea adds soothing properties. Green tea provides antioxidants. Rose water adds light fragrance and hydration. Coconut water provides electrolytes and hydration. Aloe vera juice provides hydration and anti-inflammatory benefits. Witch hazel provides gentle astringency. These water-based components determine the conditioner’s hydrating properties and can be customized based on your specific needs.
Emulsifiers: Making Oil and Water Mix
Emulsifiers allow oil and water to blend smoothly instead of separating. Aloe vera gel is a natural emulsifier that also soothes and hydrates. Honey naturally emulsifies and adds conditioning properties. Lecithin (from sunflower or soy) is a powerful natural emulsifier. Xanthan gum is a vegetable-based thickener and emulsifier. Glycerin acts as both emulsifier and humectant. Coconut milk provides creaminess and emulsifying action. These ingredients ensure your homemade conditioner has a smooth, consistent texture that distributes evenly through hair.
Protein Sources and Strengthening Agents
Proteins strengthen hair and fill gaps in damaged areas. Egg yolks are rich in proteins and natural oils. Greek yogurt provides probiotics and protein. Coconut milk contains plant proteins. Mayonnaise (made with eggs and oil) provides intensive protein and moisture. Milk powder provides protein and calcium. Silk amino acids provide strength and slip. Hydrolyzed protein powder offers concentrated protein. These ingredients help strengthen normal hair and prevent future damage.
Fragrance and Essential Oils
Essential oils provide pleasant fragrance while offering additional benefits. Lavender oil is calming and has a pleasant floral scent. Rosemary oil stimulates circulation and strengthens. Lemon oil is invigorating and clarifying. Peppermint oil stimulates and refreshes. Chamomile oil soothes and calms. Tea tree oil (used carefully) addresses scalp issues. Rose oil provides luxury fragrance. Always dilute essential oils in a carrier oil before adding to prevent scalp irritation never use pure essential oil directly.
3. Basic Conditioner Recipes for Normal Hair

These foundational recipes work for most people with normal hair type.
Recipe 1: Simple Coconut Oil Conditioner
The most basic conditioner that works beautifully for normal hair.
Ingredients:
- 1/4 cup coconut oil
- 1/2 cup distilled water
- 1 tablespoon honey
- 2 drops lavender essential oil
Instructions:
- Warm coconut oil gently in double boiler until liquid
- Combine distilled water with honey in separate container
- Slowly pour honey-water mixture into coconut oil while stirring constantly
- Add lavender essential oil
- Let cool and thicken before storing
- Shake well before each use
Best For: Normal hair seeking basic conditioning and shine. Use 2-3 times weekly.
Recipe 2: Argan Oil and Aloe Vera Conditioner
A lightweight conditioner with excellent shine and hydration.
Ingredients:
- 2 tablespoons argan oil
- 1/2 cup aloe vera gel
- 2 tablespoons distilled water
- 1 tablespoon vegetable glycerin
- 2 drops rose essential oil
Instructions:
- Mix aloe vera gel with distilled water
- Add vegetable glycerin and stir thoroughly
- Incorporate argan oil gradually while stirring
- Add rose essential oil
- Mix until smooth consistency
- Store in airtight container
Best For: Normal hair needing shine and light hydration. Use after each shampoo.
Recipe 3: Honey and Jojoba Oil Conditioner
A balancing conditioner suitable for normal hair year-round.
Ingredients:
- 3 tablespoons jojoba oil
- 1/2 cup chamomile tea (brewed and cooled)
- 2 tablespoons raw honey
- 1 tablespoon vegetable glycerin
- 3 drops lavender essential oil
Instructions:
- Brew chamomile tea and allow to cool completely
- Mix cooled tea with honey
- Add vegetable glycerin and stir well
- Incorporate jojoba oil
- Add lavender essential oil
- Shake before each use
Best For: Normal hair with balanced needs. Use 2-3 times weekly.
Recipe 4: Olive Oil Conditioning Rinse
A budget-friendly, highly effective conditioner for normal hair.
Ingredients:
- 1/4 cup extra virgin olive oil
- 3/4 cup distilled water
- 1 tablespoon honey
- 1/2 teaspoon lemon juice
- 2 drops lemon essential oil
Instructions:
- Warm olive oil gently
- Mix distilled water with honey and lemon juice
- Combine oil and water mixtures slowly while stirring
- Add lemon essential oil
- Store in glass bottle
- Shake well before application
Best For: Budget-conscious normal hair care. Use 2-3 times weekly.
Recipe 5: Avocado and Coconut Milk Conditioner
A creamy conditioner with excellent slip and conditioning.
Ingredients:
- 1/4 cup coconut milk
- 2 tablespoons avocado oil
- 1/4 cup aloe vera gel
- 1 tablespoon raw honey
- 2 drops vanilla extract
- 2 drops peppermint essential oil
Instructions:
- Shake coconut milk well
- Mix with aloe vera gel and honey
- Add avocado oil gradually
- Incorporate vanilla extract and peppermint oil
- Blend until smooth
- Store in refrigerator
Best For: Normal hair seeking creamy texture and slip. Use 2 times weekly.
4. Protein-Enriched Conditioner Recipes for Strength
These recipes emphasize protein for stronger, more resilient hair.
Recipe 6: Egg and Almond Oil Protein Conditioner
Intensive protein conditioning from natural egg protein.
Ingredients:
- 1 egg yolk
- 2 tablespoons almond oil
- 1/4 cup distilled water
- 1 tablespoon honey
- 1/2 teaspoon vanilla extract
Instructions:
- Whisk egg yolk thoroughly to prevent lumps
- Warm almond oil slightly
- Add honey and vanilla to oil
- Slowly combine oil mixture with whisked egg yolk
- Add water gradually while stirring
- Store in refrigerator and use within one week
Best For: Normal hair needing protein strengthening. Use weekly.
Recipe 7: Greek Yogurt Protein Conditioner
Gentle protein and probiotic-rich conditioning.
Ingredients:
- 1/4 cup Greek yogurt (plain, unflavored)
- 2 tablespoons coconut oil
- 2 tablespoons rose water
- 1 tablespoon raw honey
- 2 drops chamomile essential oil
Instructions:
- Mix Greek yogurt with rose water to thin consistency
- Warm coconut oil slightly
- Add honey to oil
- Slowly combine oil mixture with yogurt mixture
- Add chamomile essential oil
- Apply to hair and leave 15-20 minutes
- Store in refrigerator
Best For: Normal hair needing gentle protein and probiotics. Use weekly.
Recipe 8: Coconut Milk and Egg Conditioner
Double protein source for maximum strengthening.
Ingredients:
- 1/4 cup coconut milk
- 1 egg yolk
- 2 tablespoons sesame oil
- 2 tablespoons distilled water
- 1 tablespoon honey
- 2 drops rosemary essential oil
Instructions:
- Whisk egg yolk thoroughly
- Mix coconut milk with distilled water
- Combine egg with milk mixture
- Warm sesame oil and add honey
- Slowly combine all ingredients
- Add rosemary essential oil
- Store in refrigerator
Best For: Normal hair needing intensive protein. Use 1-2 times weekly.
Recipe 9: Mayonnaise-Based Conditioner
Rich protein and oil conditioning.
Ingredients:
- 1/4 cup mayonnaise (egg-based)
- 2 tablespoons coconut oil
- 2 tablespoons distilled water
- 1 teaspoon honey
- 2 drops lemon essential oil
Instructions:
- Mix mayonnaise with distilled water to thin slightly
- Add honey and stir well
- Warm coconut oil and combine slowly
- Add lemon essential oil
- Apply to hair focusing on mid-lengths and ends
- Leave 15-30 minutes
- Store in refrigerator
Best For: Normal to dry hair needing intensive protein and conditioning. Use weekly.
5. Lightweight Conditioner Recipes for Fine Normal Hair
These recipes provide conditioning without heaviness.
Recipe 10: Green Tea and Grapeseed Oil Conditioner
Light antioxidant and moisture conditioning.
Ingredients:
- 1/2 cup green tea (brewed and cooled)
- 2 tablespoons grapeseed oil
- 1 tablespoon vegetable glycerin
- 1/2 tablespoon honey
- 2 drops chamomile essential oil
Instructions:
- Brew green tea and allow to cool completely
- Mix cooled tea with vegetable glycerin
- Add honey and stir well
- Incorporate grapeseed oil
- Add chamomile essential oil
- Store in spray bottle for easy application
Best For: Fine normal hair or those preferring lightweight conditioning. Use after each wash.
Recipe 11: Rose Water and Jojoba Oil Conditioner
Lightweight hydration with pleasant fragrance.
Ingredients:
- 2/3 cup rose water
- 2 tablespoons jojoba oil
- 1 tablespoon vegetable glycerin
- 1/2 tablespoon honey
- 2 drops rose essential oil (optional, already in rose water)
Instructions:
- Mix rose water with vegetable glycerin
- Add honey and stir until dissolved
- Incorporate jojoba oil gradually
- Add rose essential oil if desired
- Store in glass bottle
- Shake before use
Best For: Fine or delicate normal hair. Use after every wash.
Recipe 12: Coconut Water and Almond Oil Conditioner
Electrolyte-rich hydration with lightweight conditioning.
Ingredients:
- 1/2 cup coconut water
- 2 tablespoons sweet almond oil
- 1 tablespoon aloe vera gel
- 1/2 tablespoon honey
- 2 drops peppermint essential oil
Instructions:
- Mix coconut water with aloe vera gel
- Add honey and stir well
- Incorporate almond oil
- Add peppermint essential oil
- Store in refrigerator (use within one week due to coconut water freshness)
- Shake before each use
Best For: Fine normal hair needing hydration without weight. Use 2-3 times weekly.
6. Specialty and Advanced Conditioner Recipes
These recipes address specific needs and use advanced techniques.
Recipe 13: Herbal Infusion Conditioner with Rosemary and Lavender

Custom-blended herbal conditioning.
Ingredients:
- 1/4 cup dried rosemary
- 1/4 cup dried lavender
- 1 cup distilled water
- 2 tablespoons argan oil
- 1 tablespoon honey
- 1 tablespoon aloe vera gel
Instructions:
- Steep rosemary and lavender in hot water for 20 minutes
- Strain thoroughly and allow to cool
- Measure 1/2 cup of infusion
- Mix with honey and aloe vera gel
- Incorporate argan oil slowly
- Store in glass bottle
- Shake well before each use
Best For: Normal hair seeking botanical benefits. Use 2-3 times weekly.
Recipe 14: Silk Amino Acid and Oil Conditioning Treatment
Professional-quality conditioning with slip-enhancing proteins.
Ingredients:
- 1/4 cup distilled water
- 2 tablespoons coconut oil
- 1 tablespoon argan oil
- 1 tablespoon aloe vera gel
- 1 teaspoon silk amino acid powder
- 1/2 tablespoon honey
- 2 drops lavender essential oil
Instructions:
- Mix distilled water with honey and aloe vera gel
- Whisk in silk amino acid powder until dissolved
- Warm coconut oil and argan oil together
- Slowly combine oil mixture with water mixture
- Add lavender essential oil
- Stir thoroughly until well blended
- Store in airtight container
Best For: Normal hair seeking salon-quality conditioning and enhanced slip. Use 1-2 times weekly.
Recipe 15: Apple Cider Vinegar Clarifying Conditioner
Gentle cleansing conditioner that clarifies while conditioning.
Ingredients:
- 1/2 cup distilled water
- 2 tablespoons apple cider vinegar (raw, with mother)
- 2 tablespoons coconut oil
- 1 tablespoon honey
- 1 tablespoon aloe vera gel
- 2 drops lemon essential oil
Instructions:
- Mix distilled water with apple cider vinegar
- Add honey and aloe vera gel
- Warm coconut oil gently
- Slowly combine oil with vinegar mixture
- Add lemon essential oil
- Store in glass bottle
- Shake very well before each use
Best For: Normal hair accumulating product buildup. Use weekly as clarifying treatment.
7. Comparing Homemade vs. Commercial Conditioners
Understanding the differences helps justify the effort of making your own.
| Factor | Homemade Conditioner | Commercial Conditioner | Winner |
|---|---|---|---|
| Cost per Use | $0.50-2.00 | $3.00-8.00 | Homemade |
| Ingredient Control | Complete | Limited | Homemade |
| Natural Ingredients | 100% possible | Often synthetic | Homemade |
| Shelf Life | 2-4 weeks | 1-2 years | Commercial |
| Preparation Time | 10-15 minutes | None | Commercial |
| Chemical-Free | Yes possible | Usually contains chemicals | Homemade |
| Customization | Fully customizable | Pre-formulated | Homemade |
| Environmental Impact | Minimal waste | Plastic packaging | Homemade |
| Effectiveness | Excellent | Good | Homemade |
| Hair Feel | Natural, healthy | Coated, temporary | Homemade |
Why Making Your Own Makes Sense Financially
The financial case for homemade conditioner is compelling. A single bottle of commercial conditioner (8-16 oz) costs $15-40 and lasts approximately 4-8 weeks depending on frequency and hair length. A homemade batch costs $2-8 in ingredients and provides equivalent or better results. Even if you spend $30 on initial ingredients, you can make 15+ batches before needing to replenish. The cost per use drops dramatically with homemade options. When you factor in superior quality and ingredient control, the decision becomes obvious.
Ingredient Superiority and Hair Health
Commercial conditioners often prioritize shelf stability and aesthetics over hair health. Silicones coat hair temporarily but build up over time. Sulfates and parabens can irritate sensitive scalps. Synthetic fragrances may cause allergic reactions. Most importantly, these ingredients prevent your hair’s natural healing processes from working optimally. Homemade conditioners allow pure, nutrient-dense ingredients direct access to your hair. These genuine ingredients work with your hair’s biology rather than against it. Over time, hair conditioned with natural products becomes progressively healthier, shinier, and stronger.
Convenience Comparison
The primary advantage of commercial conditioners is convenience—they’re ready to use immediately. Homemade conditioners require 10-15 minutes preparation initially. However, most people prepare batches weekly, making the preparation convenient and part of their routine. Batch preparation also ensures fresh product always available. Many people find the process enjoyable and meditative—it’s become part of their self-care ritual. For those willing to invest 10-15 minutes per week, the benefits far outweigh the minor inconvenience.
Environmental Considerations
Commercial conditioners generate significant plastic waste—thousands of bottles end up in landfills annually. Homemade conditioners use minimal packaging, usually simple glass containers you already have or inexpensive glass jars. The ingredients are natural and biodegradable, not synthetic chemicals. Making your own eliminates the carbon footprint of manufacturing and shipping commercial products. For environmentally conscious consumers, homemade conditioning is clearly the superior choice.
8. Step-by-Step Guide to Making Perfect Conditioner Every Time
Following proper technique ensures consistent, high-quality results.
Essential Equipment and Preparation
Gather all necessary equipment before beginning. You’ll need glass mixing bowls (avoid plastic that absorbs oils and stains), measuring spoons and cups for accuracy, whisks or forks for proper mixing, a double boiler or heat-safe bowl over simmering water for gently warming ingredients, clean glass bottles or jars with tight-sealing lids for storage, and labels for dating product. Sterilize all containers by washing in hot soapy water, rinsing thoroughly, and air drying completely. Clean equipment prevents contamination and ensures product safety. Glass containers prevent ingredient degradation better than plastic and don’t absorb odors or stains.
Key Preparation Steps:
- Gather all ingredients and equipment before starting
- Measure all ingredients precisely
- Use glass containers exclusively
- Sterilize all containers thoroughly
- Have labels ready for dating product
- Ensure adequate work space and clean surface
Proper Mixing Techniques for Smooth Consistency
Achieving proper consistency requires following correct mixing order and technique. Always add water-based ingredients slowly to oils while stirring constantly—never the reverse, as this causes separation. Use figure-eight stirring patterns rather than circles to prevent air bubble trapping. Mix for at least 2-3 minutes after combining all ingredients to ensure thorough blending. For recipes with egg, whisk egg thoroughly before adding to prevent lumps. For recipes using essential oils, add last after other ingredients fully incorporate. Proper mixing creates smooth, creamy conditioner that applies evenly and feels luxurious.
Critical Mixing Steps:
- Add water-based ingredients slowly to oils
- Stir constantly while combining
- Mix for at least 2-3 minutes total
- Use figure-eight stirring patterns
- Whisk eggs thoroughly before incorporating
- Add essential oils last
Storage, Shelf Life, and Safety Considerations
Proper storage ensures your conditioner remains fresh and safe. Store in glass containers with airtight lids, away from direct sunlight and heat. Conditioners without eggs or dairy last 2-4 weeks at room temperature. Recipes containing eggs, yogurt, or milk must be refrigerated and used within 5-7 days. Always inspect before use—if it smells off, shows mold, or separates and won’t remix, discard immediately. Label containers with date created and contents. Never use fingers to scoop product—always use a clean spoon to prevent contaminating the entire batch. Shake well before each use as some separation naturally occurs.
Storage Best Practices:
- Use glass containers with tight-sealing lids
- Keep away from direct light and heat
- Refrigerate egg/dairy recipes
- Use within recommended timeframe
- Label with date and contents
- Always use clean utensil for scooping
- Discard if shows signs of spoilage
Customizing Recipes for Your Specific Hair Needs
The beauty of homemade conditioner is endless customization possibilities. For dry hair, increase oil content or use heavier oils like coconut. For fine hair, reduce oil content and use lighter oils like jojoba. For damaged hair, increase protein content using eggs or yogurt. For shine, add vitamin E oil or argan oil. For scalp health, add soothing ingredients like aloe or chamomile. For scent, adjust essential oil amounts or types. Start with a base recipe and make one change at a time, noting results. This way you develop your perfect formula through experimentation.
Customization Ideas:
- Increase oils for dryness (add 1-2 tablespoons)
- Use lighter oils for fine hair (jojoba, grapeseed)
- Add protein for strength (egg, yogurt)
- Include vitamin E for shine
- Add soothing herbs for scalp care
- Adjust essential oil amounts for fragrance
- Keep notes on experiments
9. Application Methods for Optimal Results

How you apply conditioner significantly impacts effectiveness.
Proper Application Technique for Normal Hair
Application technique matters as much as formulation. After shampooing, squeeze out excess water so hair is damp but not dripping. Apply conditioner starting at mid-lengths, never at roots where it can cause greasiness. Work downward toward ends, which usually need most conditioning. For shoulder-length hair, use approximately one tablespoon of conditioner. For longer hair, use more proportionally. Distribute evenly using your fingers or a wide-tooth comb. Once applied, you can lightly massage the scalp area if desired, but focus mainly on lengths and ends. Some people wrap hair in a warm towel while conditioner sits, which speeds penetration. The standard timing is 3-5 minutes for normal conditioner, though you can leave on longer for deeper conditioning.
Application Steps:
- Shampoo hair thoroughly first
- Squeeze out excess water (damp, not soaking)
- Apply conditioner starting at mid-lengths
- Work toward ends with more concentration
- Distribute evenly with fingers or comb
- Can optionally wrap in warm towel
- Leave on 3-5 minutes
- Rinse thoroughly with cool water
Frequency Recommendations for Different Hair Conditions
How often to condition depends on several factors. For normal hair with normal oil production, conditioning after each shampoo is ideal. Most people shampoo 2-4 times weekly, so this means conditioning 2-4 times weekly. If you shampoo daily, you can condition daily. If you shampoo weekly, condition weekly. Listen to your hair—if it looks dull or feels dry, condition more frequently. If it looks limp or oily, reduce frequency. Normal hair typically balances easily, so find what works for you and stick with that routine. Consistency matters more than frequency.
Frequency Guidelines:
- Condition after every shampoo
- Most people: 2-4 times weekly
- Daily shampoers: daily conditioning
- Weekly shampoers: weekly conditioning
- Adjust based on hair appearance and feel
- Consistency is more important than frequency
Combining With Other Hair Care for Best Results
Conditioner works best as part of comprehensive hair care. Use a gentle, sulfate-free shampoo that doesn’t strip hair. After conditioning and rinsing, you can apply a lightweight leave-in conditioner for extra benefits. Use cool water for final rinse—this seals the cuticle and adds shine. Minimize heat styling or use heat protectant products. Get regular trims every 6-8 weeks to maintain healthy ends. These practices amplify your homemade conditioner’s effectiveness.
Optimal Hair Care Routine:
- Use gentle, sulfate-free shampoo
- Apply homemade conditioner after shampooing
- Rinse thoroughly with cool water
- Optional: apply lightweight leave-in conditioner
- Minimize heat styling
- Get regular trims
- Protect from sun and environmental stress
10. Troubleshooting Common Conditioner Problems
Even careful preparation sometimes leads to issues that can be easily fixed.
Product Separation and Consistency Issues
If your conditioner separates into oil and water layers, the emulsification failed. This doesn’t make it unsafe but indicates suboptimal formulation. You can still use it by remixing thoroughly before each application. For future batches, add more emulsifier (aloe vera gel or honey), mix longer (at least 3-5 minutes), or adjust temperature when combining ingredients. If consistency is too thick, add a bit more water or aloe vera gel to thin. If too thin, add more carrier oil or a small amount of honey to thicken. Consistency should be creamy and pourable, not runny or stiff.
Solutions for Consistency Issues:
- Separation: remix thoroughly, increase emulsifier, mix longer
- Too thick: add more water or aloe vera gel gradually
- Too thin: add more oil or honey
- Test on small hair section before full application
- Adjust gradually to find perfect consistency
Greasy or Heavy Hair After Conditioning
If hair feels greasy after conditioning, you’ve used too much product or left it on too long. For future applications, use less—start with one tablespoon and add only if needed. Reduce the time from 5 minutes to 3 minutes. Alternatively, you may have applied to roots when you should focus only on mid-lengths and ends. Another possibility is that your formula contains too much oil. For future batches, reduce carrier oil by 1-2 tablespoons. Sometimes “greasy” actually means your hair is finally getting proper conditioning and you’re not accustomed to it—this adjustment period passes within a few applications.
Solutions for Greasy Hair:
- Use less product (start with 1 tablespoon)
- Reduce application time
- Apply only to mid-lengths and ends, never roots
- Reduce oil content in recipes
- Adjust to new appearance (usually temporary)
Dry or Dull Hair Despite Conditioning
If hair still appears dry or dull after conditioning, several factors could be responsible. Your formula may not be right for your hair’s needs. If using lightweight recipes for naturally dry hair, switch to oil-richer formulas. If the issue is buildup from previous products, clarify with a sulfate-free clarifying shampoo before conditioning. Ensure you’re rinsing thoroughly—incomplete rinsing leaves conditioner residue that appears dull. Use a cool water final rinse to seal cuticles and add shine. You might also need to condition more frequently if your hair is particularly dry.
Solutions for Dry or Dull Hair:
- Switch to oil-richer formula
- Clarify to remove product buildup
- Rinse thoroughly after conditioning
- Use cool water final rinse
- Condition more frequently
- Leave conditioner on slightly longer
Scalp Irritation or Sensitivity Issues
If you experience scalp itching or irritation, you likely have an ingredient sensitivity. Stop using immediately and rinse thoroughly. Identify the problem ingredient—often essential oils, or occasionally a particular oil. Remove that ingredient from future recipes. If allergic to eggs, use egg-free recipes like argan and aloe formulas. If allergic to dairy, avoid yogurt-based recipes. Some people are sensitive to certain essential oils but not others. Always patch test new recipes on a small scalp area before applying to whole head. Most sensitivity issues resolve immediately when use stops.
Solutions for Sensitivity:
- Stop use and rinse thoroughly
- Identify problem ingredient
- Remove from future recipes
- Patch test new formulas before full use
- Consider whether essential oil is the culprit
- Use hypoallergenic ingredient alternatives
11. Essential Ingredients Deep Dive: Understanding What You’re Using
Knowing why each ingredient is included helps you make informed customizations.
Carrier Oils: Properties and Best Uses
Each carrier oil offers unique properties. Coconut oil is conditioning and protein-like but can solidify in cold environments. Argan oil is lightweight yet deeply nourishing, ideal for shine. Jojoba oil balances oil production and works for all hair types. Olive oil is affordable and deeply conditioning. Almond oil adds shine and strength. Avocado oil nourishes intensively. Grapeseed oil is lightweight, great for fine hair. Sesame oil strengthens and has anti-inflammatory properties. Understanding these properties helps you choose oils aligned with your hair’s specific needs. Experiment with different oils to find your favorites.
Oil Selection Guide:
- Coconut: conditioning, protein, antimicrobial
- Argan: lightweight, shiny, nourishing
- Jojoba: balancing, sebum-like
- Olive: affordable, deeply conditioning
- Almond: shine, strength, B vitamins
- Avocado: intensive nourishment
- Grapeseed: lightweight, fine hair
- Sesame: strengthening, anti-inflammatory
Water-Based Ingredients and Their Benefits
Water hydrates hair, but herbal infusions add benefits. Distilled water is pure baseline hydration. Chamomile tea soothes and calms. Green tea provides antioxidants. Rose water adds light fragrance and hydration. Coconut water provides electrolytes. Aloe vera juice provides hydration and healing. These water-based components can be customized entirely based on your hair’s needs and desired benefits.
Water-Based Ingredient Benefits:
- Distilled water: pure hydration
- Chamomile: soothing, calming
- Green tea: antioxidant protection
- Rose water: light, fragrant hydration
- Coconut water: electrolyte-rich hydration
- Aloe vera: healing, hydrating
Emulsifiers: Making Ingredients Work Together
Emulsifiers allow oils and water to blend and stay mixed. Aloe vera gel emulsifies while providing hydration. Honey emulsifies while conditioning. Lecithin is powerful but less common. Glycerin emulsifies while drawing moisture into hair. Understanding emulsifiers helps you troubleshoot separation issues and create better-blending recipes.
Emulsifier Properties:
- Aloe vera: hydrating, soothing emulsifier
- Honey: conditioning, humectant emulsifier
- Lecithin: powerful, less common
- Glycerin: humectant, moisture-drawing
Proteins: Choosing the Right Type
Different protein sources offer different benefits. Eggs provide strong, naturally-occurring protein. Yogurt provides proteins plus probiotics. Coconut milk provides plant proteins. Mayonnaise provides egg protein with added oils. Understanding protein sources helps you choose appropriate recipes for your conditioning needs.
Protein Source Comparison:
- Egg yolks: intensive protein, natural oils
- Greek yogurt: protein, probiotics, mild
- Coconut milk: plant protein, creamy
- Mayonnaise: strong protein, oily
12. Creating a Sustainable Long-Term Conditioning Routine

Making conditioner part of your regular self-care routine ensures consistent hair health.
Weekly Preparation and Batch-Making Strategy
Preparing conditioner weekly ensures you always have fresh product available. Choose a consistent day (like Sunday evening) to prepare your weekly batch. Set aside 15-20 minutes for preparation. Prepare 2-4 cups at a time depending on your usage. Store portions in separate containers to have backup batches. This routine makes conditioning convenient and ensures you never run out. Many people find the preparation meditative and enjoyable it becomes part of self-care ritual.
Batch-Making Tips:
- Choose consistent preparation day
- Allocate 15-20 minutes
- Prepare 2-4 cups per batch
- Use multiple containers for backup
- Label everything with date
- Keep notes on what works best
Tracking Results and Adjusting Recipes
Keep simple notes on which recipes work best for your hair. After using a recipe for 2-3 weeks, rate it on shine, softness, manageability, and overall satisfaction. Note which ingredients seemed to make the biggest difference. Track seasonal variations—your hair might need different formulas in summer versus winter. Over time, you’ll develop a repertoire of 3-5 favorite recipes you rotate through. This experimentation phase is enjoyable and results in perfectly customized conditioning.
Tracking System:
- Rate recipes weekly
- Note ingredient preferences
- Track seasonal variations
- Develop rotation of favorite recipes
- Keep written notes for reference
- Adjust based on results
Seasonal Adjustments to Your Routine
Hair needs change seasonally. Summer humidity may allow lighter conditioning formulas while protecting against UV damage. Winter dryness requires richer conditioning. Spring and fall might be transition seasons needing moderate approaches. Adjust your recipe selections seasonally. In summer, emphasize antioxidant ingredients like green tea and vitamin E. In winter, increase oil content and use warming ingredients. These adjustments optimize results year-round.
Seasonal Conditioning:
- Summer: light formulas, antioxidants, UV protection
- Winter: rich formulas, extra oils, intensive care
- Spring/Fall: transitional, moderate formulas
- Adjust ingredient selection seasonally
Scaling Recipes for Different Hair Types and Lengths
The recipes provided assume medium-length hair. Adjust quantities for your hair length and thickness. Short hair might use half amounts. Long, thick hair might use double amounts. Fine hair might use less conditioner overall. Coarse hair might use more. Starting with the provided amounts, adjust based on what feels right for your hair. If you have very long or very thick hair, proportionally increase all ingredients. The ratios are more important than absolute amounts.
Scaling Guidelines:
- Short hair: use 50-75% of recipe amounts
- Medium hair: use recipes as provided
- Long hair: use 125-150% of amounts
- Fine hair: reduce oils, increase water
- Thick hair: increase oils, may reduce water
- Coarse hair: may need more conditioning
Maintaining Results With Proper Overall Hair Care
Conditioning is most effective as part of comprehensive hair care. Use sulfate-free shampoos that don’t strip hair. Minimize heat styling or use heat protection. Get regular trims every 6-8 weeks to maintain health. Avoid tight hairstyles that stress hair. Protect from sun with hats or UV products. Stay hydrated and maintain healthy diet for hair growth support. Sleep on satin pillowcases to reduce friction. These practices maintain and enhance your conditioning results long-term.
Comprehensive Hair Care:
- Use sulfate-free shampoo
- Minimize heat styling
- Get regular trims
- Avoid tight hairstyles
- Protect from sun
- Stay hydrated
- Maintain healthy diet
- Use satin pillowcase
CONCLUSION
Creating your own hair conditioner is one of the most rewarding and practical steps you can take for your hair’s health and your wallet’s wellbeing. With fifteen proven recipes covering everything from basic conditioning to specialized treatments, you have unlimited options for customization and experimentation. Whether you’re motivated by cost savings, desire for chemical-free products, or environmental concerns, homemade conditioning delivers on all fronts.
The recipes provided represent years of combined experience from home hair care enthusiasts. Each has been tested and refined for optimal results. However, they’re not fixed formulas—they’re starting points for your personal experimentation. Your ideal conditioner is likely a customization of one of these recipes, adjusted specifically for your hair’s unique needs.
The process of making conditioner becomes increasingly enjoyable and meditative as it becomes routine. Many people find weekly preparation to be a cherished part of their self-care practice. The small investment of time returns enormous dividends in hair quality, cost savings, and the satisfaction of knowing exactly what you’re putting on your hair.
Begin with whichever recipe appeals most to you. Use it consistently for 2-3 weeks to assess results. Take notes on what works and what might be adjusted. Gradually build your personal conditioner formula collection. Within months, you’ll have developed a sustainable routine using conditioner perfectly customized for your individual hair needs.
Your hair will thank you with increased shine, improved manageability, enhanced strength, and a healthier appearance than commercial products could ever provide. Start today—your healthiest hair is just a few simple ingredients away.