Curly Hair for Round Face Women: Flattering Styles, Cuts, and Styling Techniques
Curly hair and round faces seem to clash. The natural volume and width of curls can make a round face look wider. But curly hair and round faces work beautifully together when you use the right cuts, lengths, and styling techniques. Strategic layering, directional styling, and intentional volume placement create a longer, slimmer silhouette without fighting your curl pattern. This guide shows you exactly how to style curly hair to flatter a round face.
1. Why It Matters for Curly Hair Styling
Face shape determines which hairstyles work and which make you look worse. A style that flatters a long face elongates a round face. Understanding your face shape and how curly hair interacts with it prevents poor styling decisions.
How to Identify a Round Face Shape Accurately
A round face has equal width and length. The face is widest at the cheekbones. The jawline is soft and curved, not angular. The forehead is also rounded. To identify your face shape, pull your hair back tightly and look in the mirror. Measure across your forehead, cheekbones, and jawline. If all three measurements are roughly equal, you have a round face.
Round faces are characterized by softness and symmetry. The opposite of a round face is an oblong or long face, which is longer than it is wide. An oval face is slightly longer than wide with a wider cheekbone area. A square face has an angular jawline. A heart face is wider at the forehead and narrower at the jaw.
How Curly Hair Naturally Interacts with Round Face Proportions
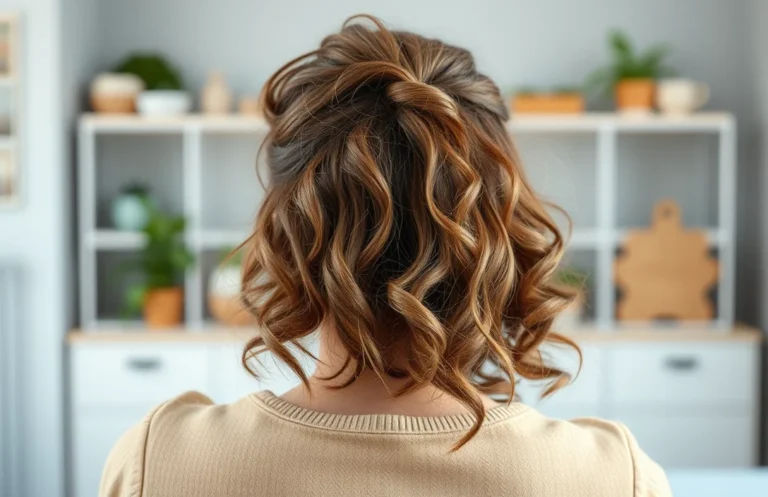
Curly hair has natural volume. This volume sits perpendicular to the scalp. On a round face, volume on the sides makes the face appear wider, which you do not want. Volume at the crown creates height and elongates the face, which flatters round faces. The key is redirecting the natural volume of your curls.
Curls that point outward at ear level add width. Curls that point upward or are styled to avoid the ear area reduce width appearance. Loose curls that fall straight down add length. Curls that bounce horizontally add width. Understanding these interactions lets you manipulate your curl pattern to flatter your face.
The Relationship Between Facial Proportions and Hair Volume
A round face has more volume in the horizontal plane (side to side) than a long face. Adding more horizontal volume makes round faces look rounder. Subtracting horizontal volume makes them look slimmer. This is why volume placement strategy is critical.
Hair length also interacts with face width. Short hair that sits at chin length creates a horizontal line at the widest part of your face (the cheekbones). This emphasizes width. Longer hair that extends past your chin moves the bottom line lower, creating a longer overall silhouette.
How Hair Volume, Width, and Length Interact With Facial Features
- Volume at crown: elongates, makes face look slimmer, flatters round faces
- Volume at sides (ear level): emphasizes width, makes round faces look rounder
- Volume at nape: draws attention downward, lengthens overall appearance
- Short length (above chin): emphasizes cheekbone width, less flattering for round faces
- Medium length (chin to shoulder): can be flattering with right styling
- Long length (past shoulder): elongates, generally flattering for round faces
- Tight curls: add vertical height, elongate
- Loose curls: add horizontal width, can make round faces look wider
- Layering: creates internal lines and movement
- Blunt ends: create horizontal lines, emphasize width
2. Best Curly Hair Lengths for Round Face Shapes

Length is the most important factor in flattering a round face. The right length works with your face shape instead of against it. The wrong length emphasizes your face’s widest points.
Why Hair Length Matters More Than Cut Style
Length determines where your hair ends and what lines it creates on your face. A chin-length cut creates a line right at your cheekbones, the widest part of your face. This emphasizes width. A longer cut that ends past your chin extends the apparent length of your face. This elongates.
Hair length also determines how much your curls add to width. Shorter curls at ear level sit at the cheekbone and add width. Longer curls that extend past your chin sit lower and add less width at cheekbones.
Short Curly Hair Cuts That Flatter Round Faces
Short curly hair can flatter a round face if cut strategically. The cut must have significant layering and height. A pixie cut with a high crown works. A short tapered cut with height at the crown works. What does not work is a short, blunt, rounded cut.
Short cuts work best when you style them with volume on top. Blow-dry with a diffuser to maximize height. Avoid plopping or air-drying if you are going for height. Sleeping on a satin pillowcase and styling in the morning gives you the most control over direction and volume.
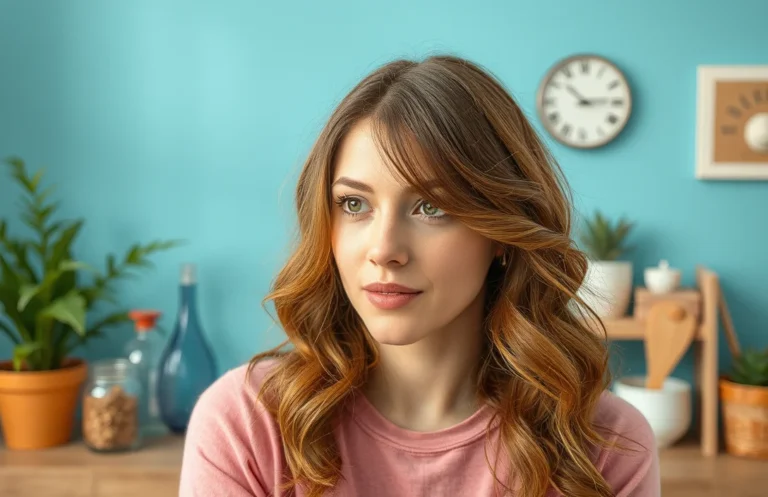
Medium-Length Curly Styles for Face Balance and Flattery
Medium-length curly hair, typically chin to shoulder length, requires specific styling to flatter round faces. The cut must have layers to avoid a rounded silhouette. Layers create angles and movement. Ask for longer layers on top that frame the face and shorter internal layers that add movement.
Medium length works best when styled with height at the crown and some length in front. Face-framing layers that hit at chin length or longer are essential. The goal is to avoid a rounded shape that mimics your face shape. Angles and asymmetry work better than symmetry.
Length Recommendations by Hair Type and Curl Pattern
| Hair Type | Short (Above Chin) | Medium (Chin-Shoulder) | Long (Past Shoulder) |
|---|---|---|---|
| Type 2 Wavy | Okay with layers, add height | Best option, flattering | Very flattering |
| Type 3A/3B Curly | Difficult, need major layering | Good with layers | Best, most flattering |
| Type 3C Tight Curls | Difficult, requires styling | Good with layers | Best option |
| Type 4A Coils | Very difficult, very tight | Good with layers | Best, more styling control |
| Type 4B/4C Coily | Most difficult, high maintenance | Good with heavy layers | Best, most forgiving |
- Short cuts need 30% of hair as layers to avoid roundness
- Medium cuts need 40% of hair as layers for proper movement
- Long cuts with minimal layering still flatter because of length alone
- Shortest layer should be at least 2 inches from the root for height
- Longest layer should extend past the chin for elongation
3. Layering Strategies That Elongate and Slim Round Faces

Layering is not optional for round faces with curly hair. Strategic layering creates angles and lines that counteract the natural roundness. Without proper layering, curly hair sits as a rounded blob that copies your face shape.
How Layers Create Vertical Lines and Elongation
Layers create internal lines and texture. These lines draw the eye vertically instead of horizontally. A vertical eye movement makes faces appear longer. A horizontal eye movement makes faces appear wider.
A well-layered curly cut has pieces of different lengths creating internal angles. When these pieces move independently and fall at angles, they create vertical lines. These lines elongate the silhouette.
Strategic Placement of Layers for Maximum Face Flattery
Place shorter layers on top to create height and crown volume. Place longer layers around the face to frame and extend. Place some shorter layers inside the back to add movement without bulk at the back of the head.
The shortest layers should be at the crown, maybe 2 to 3 inches shorter than the rest. This creates a peak at the top that draws eyes upward. Longer pieces around the face frame and elongate. Avoid layers that create horizontal lines at ear level or cheekbones. Layers at those points add width.
Why Some Layer Placements Make Round Faces Look Wider
Layers that start at ear level and curve around the cheekbones add width. Layers that are blunt at the ends instead of textured add horizontal lines. Layers that are too heavy and sit flat instead of moving and bouncing add roundness.
Layers that are evenly distributed around the head create a rounded silhouette that mimics your face shape. You want the majority of length in the front and top, with shorter pieces that add texture without adding width to the sides.
Layering Patterns That Flatter Round Faces
- Graduated layers: shorter in back, longer in front, elongates
- Choppy layers: creates angles, adds movement, elongates
- Wispy layers: adds texture, draws eye vertically, flatters
- Razor-cut layers: sharper definition, creates crisp angles
- Avoid: even layers all around head (creates roundness), blunt layers (create horizontal lines)
4. Texture Patterns That Flatter Round Face Shapes
Not all curl patterns flatter round faces equally. Texture pattern affects how curls sit on the head and whether they add width or elongation.
Tight Coils vs Loose Waves and Their Effect on Face Proportions
Tight coils hold shape well and point upward naturally. This upward direction creates vertical lines that elongate. Loose waves can fall flat and horizontally, which adds width. For round faces, tighter curl patterns are generally more flattering.
However, a loosely defined tight coil that bounces and moves can be flattering. A tightly defined loose wave that sits flat is less flattering. It is not just the curl type but how it is styled.
How Curl Pattern Directly Affects Face-Framing Capability
Tight curls are easier to frame with because they stay where you put them. You can create a face-framing piece that points outward at a specific angle. Loose waves are harder to frame with because they can fall flat or move unpredictably.
If you have loose waves, you need styling techniques that add definition and hold. A gel or cream that locks in the shape works. A diffuser that encourages the curl pattern helps. Styling with intention rather than just washing and going matters more for loose waves.
Defining Your Curls vs Undefined Texture for Face Flattery
Undefined texture that looks like a cloud or blob does not flatter a round face. Defined curls that are visible as individual spirals or clumps flatter better. Defined curls create visual interest and internal lines.
Styling techniques that define your curls (twist-outs, braid-outs, gel casting) are essential for round faces. These techniques create visible texture and angles. An undefined wash-and-go works better for long faces that need softness.
Curl Patterns Most Flattering for Round Faces
- Type 3C tight curls: excellent, adds height naturally
- Type 4A coils: excellent, springs back and adds height
- Type 4B coils: excellent, adds upward movement
- Type 4C coils: excellent, adds the most height and elongation
- Type 3A loose waves: good with proper styling and definition
- Type 3B medium curls: good with layers and styling
- Type 2 wavy: okay, requires more styling effort and product
5. Volume Placement: The Crown, Sides, and Nape Strategy

Where you place volume determines whether your styling flatters or detracts. Strategic volume placement is the key difference between cute and unflattering.
Why Crown Volume Elongates While Side Volume Widens
Volume at the crown (top of head) draws the eye upward. This vertical eye movement creates a longer silhouette. It also moves the widest visual point of your hair from your cheekbones (the widest point on round faces) to the top of your head. This slims the face.
Volume at the sides (ear level) draws the eye horizontally. This emphasizes the width of your face. It adds fullness right where your face is widest. This makes round faces appear wider.
How to Add Crown Height Without Creating Width
Blow-dry your hair with your head tilted back and a diffuser on the crown. This directs air and curls upward. Do not scrunch aggressively, which creates randomness. Cup and scrunch with the diffuser pointed up.
Use a volumizing mousse or root-lifting spray at the roots. Apply before wet-styling. This adds height from the start. Once hair is dry, you can adjust without the product breaking down.
Avoid plopping (wrapping wet hair in a towel on top of your head), which compresses the crown and reduces height. Scrunch gently or diffuse instead.
How to Control and Minimize Volume at the Sides
Use a smoothing serum or light oil on the side sections. This weighs them down slightly. Do not apply heavy products that create buildup, but a light serum works.
Style the sides away from your face. Tuck one side behind your ear. Pin one side up. Create asymmetry that moves hair away from the cheekbones.
Use a gel with hold on the side sections to lock them in place. This prevents them from bouncing outward throughout the day.
Volume Control Techniques by Hair Density
| Density Type | Crown Technique | Side Control | Nape Control |
|---|---|---|---|
| Fine density | Light mousse, more air | Smoothing serum | Minimal product |
| Medium density | Volumizing mousse + diffuser | Light gel, pinning | Minimal layering |
| Thick density | Heavy mousse, aggressive diffusing | Heavy gel, sectioning | Accept some volume |
| Very thick density | Extra mousse, extended diffusing | Water + gel, hand-pin | Shorter length at nape |
6. Face-Framing Techniques That Narrow and Define Your Face
Face-framing pieces are longer pieces that frame your face and extend past your chin. These pieces are visual anchors that draw attention to your face shape. Strategic face-framing elongates and slims.
The Purpose and Power of Well-Placed Face-Framing Pieces
Face-framing pieces serve multiple purposes. They create movement around the face. They draw the eye vertically instead of horizontally. They elongate the face by extending the visible length downward. They can soften a rounded cheekbone line.
Face-framing pieces work best when they are longer than your cheekbones. A piece that ends at cheekbone length creates a horizontal line. A piece that extends past the jaw (2 to 3 inches past the chin) creates a vertical line and elongates.
How Long Face-Framing Pieces Should Be for Optimal Effect
Face-framing pieces should be at least 2 to 3 inches longer than your jawline. If your jawline is at 4 inches from the crown, your face-framing pieces should be 6 to 7 inches or longer. This creates a definitive vertical line.
The pieces should be slightly shorter than the longest pieces on the back and sides. Asymmetry works. One side longer than the other is fine. Angles and length matter more than symmetry.
Placement and Angle of Frame Pieces for Cheekbone Definition
Frame pieces should fall directly in front of your cheekbones, not behind them. They should angle slightly forward and downward. This creates a slimming line down the side of your face.
If you have prominent cheekbones, frame pieces slightly behind the cheekbones soften them. If your cheekbones are soft and round, frame pieces directly in front define them. Adjust placement based on your individual face.
Face-Framing Methods for Different Curl Types
| Curl Type | Best Frame Style | Hold Method | Styling Technique |
|---|---|---|---|
| Type 2-3A loose | Longer, softer frames | Light gel or cream | Air dry with slight smoothing |
| Type 3B-3C medium | Medium frames, defined | Medium hold gel | Twist-out or gel cast |
| Type 4A coils | Shorter, tighter frames | Strong gel, cast | Two-strand twist or gel cast |
| Type 4B-4C coily | Short, defined frames | Very strong gel | Tight twist or braid cast |
7. Styling Methods That Elongate Your Face and Create Vertical Lines
How you style your curls determines whether you create vertical or horizontal visual lines. Vertical lines elongate. Horizontal lines widen.
Directional Styling and Its Impact on Face Proportions
Direct your curls upward and away from your cheekbones. Blow-dry with the diffuser tilted upward. Scrunch upward rather than side-to-side. Twist pieces as they dry to direct them upward.
Avoid pulling curls straight down, which can create vertical lines but also shows the full roundness of your face if they bounce outward. Angle curls slightly backward and upward. This creates diagonal lines, which are flattering for round faces.
How Twist-Outs and Braid-Outs Create Elongating Texture
A twist-out (two-strand twists set while wet, then untwisted for texture) creates spiral definition that draws the eye vertically. Twist pieces upward to elongate further. Braid-outs (three-strand braids set while wet) create wave texture that can be directional.
These styling methods also give you control. You decide the direction and angle. You can ensure pieces frame your face properly and avoid horizontal lines.
Diffusing Techniques for Maximum Height and Minimal Width
Use a diffuser attachment on a blow dryer. Tilt the diffuser upward. Cup the diffuser against your head while it is tilted up. This directs air and curls upward.
Move the diffuser slowly, spending 20 to 30 seconds on each section. Do not rush. Slow diffusing creates more defined curls and better height than fast, aggressive diffusing.
Flip your head as you diffuse the bottom sections. This adds extra lift. Do not spend all your time on the crown and ignore the bottom. A round face needs length and lift everywhere.
Styling Approaches That Minimize Width at Cheekbones
- Tuck one or both sides behind your ears: moves volume away from face
- Pin up the sides: keeps them off your face temporarily
- Smooth the sides with serum: reduces volume slightly
- Create deep side parts: moves volume away from one side
- Use gel on sides: locks them in place, prevents bounce
- Blend curls on sides with face-framing pieces: creates continuity
8. Colors and Highlights That Complement and Flatter Round Faces

Hair color and highlights create visual depth and can draw the eye vertically or horizontally. Strategic color choices complement round faces.
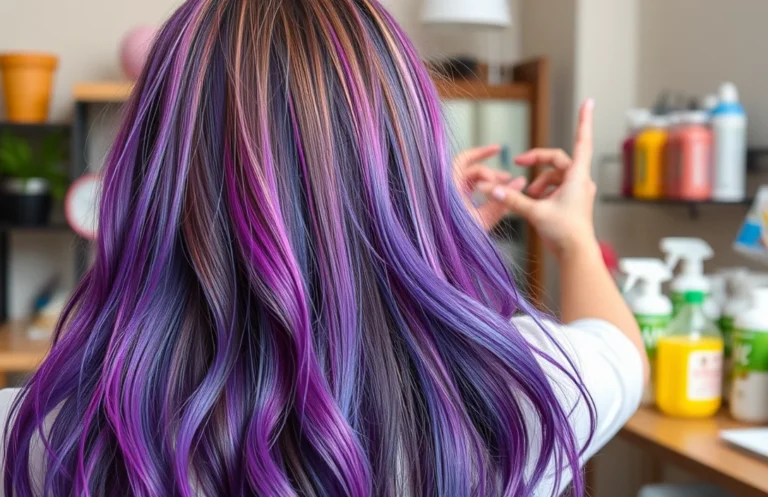
How Color Placement Creates Vertical Visual Lines and Length
Darker roots with lighter ends create a vertical gradient. The eye follows the color change from top to bottom, creating a vertical line. This elongates.
Highlights placed vertically down the face elongate. Highlights placed around the face horizontally can emphasize width. Highlights throughout create texture and movement, which can be flattering.
Dark Roots, Light Ends for Face Definition and Dimension
A rooted look with dark roots and lighter ends is flattering for round faces. The dark roots anchor at the crown. The light ends extend downward. This creates a clear vertical visual line.
Ombre and balayage with this pattern work well. The roots are dark (your natural color or darker), mid-length transitions, and ends are lighter. This is also low-maintenance because you do not need constant root touch-ups.
Highlights and Lowlights for Adding Depth and Vertical Movement
Highlights placed down the center front create a vertical line. Lowlights placed on the sides add depth and can make the face appear slimmer. Alternating highlights and lowlights create texture.
Avoid heavy highlights all around the head, which can create a horizontal cloud effect. Directional highlighting that creates lines works better.
Color Strategies by Skin Tone and Face Shape
| Skin Tone | Best Colors for Elongation | Colors That Add Dimension | Highlight Placement |
|---|---|---|---|
| Fair skin | Ashy blondes, copper | Cool browns, caramel | Center front and crown |
| Medium skin | Golden browns, warm blondes | Honey highlights, bronze | All-over with darker roots |
| Deep skin | Rich browns, burgundy, black | Copper, gold, warm highlights | Around face, deeper in crown |
| Olive skin | Ash blonde, chestnut | Caramel, honey, bronze | Concentr8ated around face |
9. Accessories and Strategic Placement for Enhanced Proportions
Accessories draw attention and can create visual lines that flatter or detract. Strategic placement of accessories helps elongate.
Clips, Headbands, and Their Visual Effects on Face Proportions
A clip or headband placed at the crown draws attention upward and elongates. A clip placed at ear level draws attention sideways. For round faces, place clips high.
A headband worn across the forehead shortens the face. A headband worn back from the forehead, a few inches up, elongates. Choose placement carefully.
Wide headbands that cover forehead-to-crown shorten round faces. Thin headbands or clips worn high are better.
Hair Jewelry and Strategic Placement for Face Flattery
Clips, pins, and hair jewelry placed high on the crown elongate. Placed at ear level, they emphasize width. For round faces, wear them high.
Gold and warm metals can add warmth and softness. Silver and cool metals can add shine and brightness. Neither has a major effect on face shape, but psychology matters. Choose metals you feel confident wearing.
Multiple small clips placed high create visual interest and height. A single large clip at one side can work but requires confidence.
Scarves and Wraps for Strategic Face Framing and Shaping
A scarf wrapped as a headwrap with curls showing in front creates texture and interest. The scarf adds height. This can be very flattering for round faces.
A long scarf tied as a head tie with pieces framing the face adds visual length. The pieces extend downward, elongating.
Scarves placed as a band or turban on the crown add height. This technique is excellent for round faces.
Accessories Placement by Primary Concern
| Concern | Accessory Type | Placement | Effect |
|---|---|---|---|
| Face width | Small clip | High crown | Draws eye up, elongates |
| Cheekbone fullness | Long earrings | Ears | Draws eye down, elongates |
| Forehead size | Headband | Back from forehead | Elongates |
| Jawline definition | Face-framing clips | Front sides | Defines without widening |
| Overall shortness | Tall clip or wrap | Crown | Adds instant height |
10. Styles to Avoid When You Have a Round Face and Curly Hair
Certain styles make round faces look rounder. Knowing what to avoid prevents bad decisions and expensive mistakes.
Why Certain Styles Emphasize Roundness Instead of Flattering
Styles that create fullness on the sides emphasize the widest part of your face. A rounded silhouette that mirrors your face shape creates an echo effect, emphasizing your round features. Blunt cuts and straight edges create horizontal lines that widen.
Styles that sit at exactly chin length create a line right at your widest point (cheekbones). This emphasizes width. Symmetrical styles where both sides match create a rounded effect.
Volume on the Sides and the Width Effect It Creates
Styles with the most volume on the sides (ear level) make round faces look wider. A rounded afro or halo effect of curls surrounding the face emphasizes roundness. Avoiding this means strategic volume placement as discussed earlier.
If you naturally have lots of side volume, use gel or serums to control it. Pin it back. Tuck it behind your ears. Create asymmetry.
Why Blunt Cuts and Straight Edges Don’t Flatter Round Faces
A blunt cut with all the same length creates a horizontal line where the hair ends. This line emphasizes width. Blunt bangs create a horizontal line across the forehead. These are generally less flattering for round faces.
Layered cuts with pieces of different lengths avoid the horizontal line problem. Angles and asymmetry work better.
Styles That Don’t Flatter Round Faces (To Avoid)
- Rounded afros with no layers: emphasizes face roundness
- Blunt bobs at chin length: creates horizontal line at widest point
- Heavy bangs across forehead: shortens and widens face
- All-over even curls with no direction: creates blob silhouette
- Styles with all volume on sides: emphasizes cheekbone width
- Symmetrical styles with both sides identical: too matchy with face
- Super short cuts without height: emphasizes face roundness
- Slicked-back styles: shows full face roundness with no softness
11. Curly Hair Cuts Specifically Designed for Round Faces

Certain cuts are engineered to flatter round faces. These cuts have specific characteristics that work with round face proportions.
The High-Low Fade with Textured Curls on Top
This cut has short, faded sides and longer textured curls on top. The fade removes volume from the sides, avoiding the width problem. The longer curls on top add height. This combination is excellent for round faces.
The longer curls should have layers and texture, not a rounded shape on top. Styling these curls with a diffuser to maximize height is essential.
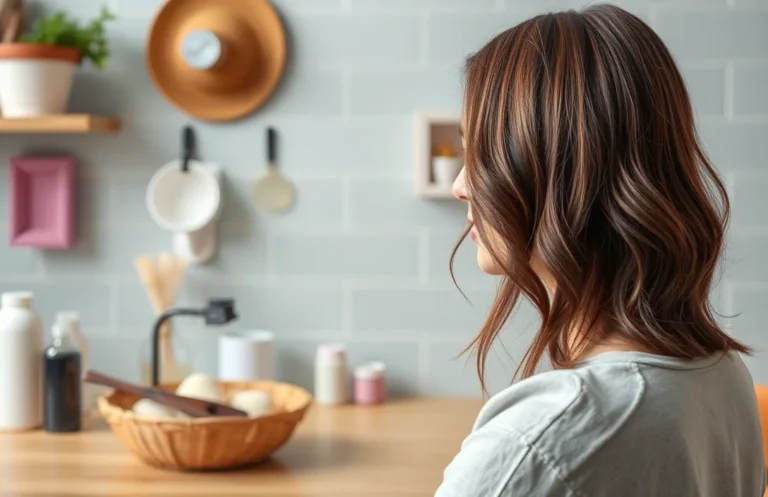
Shaggy Layered Cuts for Movement, Texture, and Length
A shaggy cut has lots of shorter layers throughout creating movement and texture. The layers prevent roundness. The overall shape is longer than it is wide due to length and layering.
Shaggy cuts work well on all hair types. They hide dense hair and add dimension to fine hair. They create angles that flatter round faces.
Angled Bobs and Asymmetrical Styles for Modern Edge
An angled bob is shorter in back, longer in front. This creates a diagonal line that elongates. The longer front pieces frame the face. This style is modern and flattering.
Asymmetrical cuts with different lengths on each side create visual interest and avoid the mirror-effect that emphasizes round features.
Popular Curly Cuts That Flatter Round Faces
| Cut Name | Characteristics | Best Hair Type | Styling Effort |
|---|---|---|---|
| Textured Pixie | Short, lots of layers, high crown | Fine to medium | Medium, needs diffuser |
| Shag | Multiple layers, feathered ends, movement | All types | Medium to high, needs styling |
| Angled Bob | Short back, long front, layered | Fine to medium | Medium, styling recommended |
| High-Low Fade | Faded sides, textured curls on top | Medium to thick | Low to medium |
| Choppy Layers | Severe angle differences, lots of texture | Medium to thick | Medium, requires styling |
| Wolf Cut | Combination of shag and bob, sharp angles | All types | Medium to high |
12. Frequently Asked Questions About Curly Hair for Round Faces
These questions appear repeatedly in forums and from stylists. Answers address real concerns.
Can You Have Bangs With Curly Hair and a Round Face
Bangs can work if they are styled correctly. Curtain bangs (center-parted, falling away from the face) work better than blunt bangs across the forehead. Curly bangs need to be shorter and more textured than straight bangs.
Avoid heavy bangs that cover the forehead. They shorten your face and can add roundness. Lighter, more textured bangs that show some forehead are better.
How Often Should You Trim Curly Hair When You Have a Round Face
Trim every 6 to 8 weeks to maintain shape and remove split ends. Regular trims keep layers crisp and prevent hair from growing into a rounded shape. Skipping trims allows your hair to grow out in ways that can become unflattering.
Ask your stylist for a cut that is intentionally shaped, not just trimmed. You want them to create angles and layers, not just cut it even shorter.
Does Face Shape Actually Matter for Curly Hair Styling
Yes, face shape matters significantly. Different face shapes benefit from different hair strategies. A round face benefits from elongation and vertical lines. A long face benefits from softness and horizontal lines. Ignoring face shape means you are not optimizing your styling.
However, confidence and personal style matter more than perfect rules. If you love a style, wear it. These are guidelines, not laws.
Common Problems and Practical Solutions for Round Faces
- Hair looks too wide: reduce side volume, use serum, pin sides back
- Face looks short: add crown height with diffuser and mousse
- Cheeks look too full: use face-framing pieces and directional styling
- Hair looks shapeless: add layers, get regular trims, style with intention
- Can’t get height: use volumizing mousse at roots, diffuse upward, avoid plopping
- Styling takes too long: get a cut that works with your curl pattern, use styling techniques like twist-outs
- Tried everything, still looks round: this is your face shape, own it, style with confidence
Summary: Your Round Face Curly Hair Styling Strategy
| Strategy | Action | Purpose |
|---|---|---|
| Length | Chin or longer | Elongates face |
| Layers | 30-40% of hair | Creates angles and movement |
| Volume placement | Crown high, sides controlled | Draws eye up, minimizes width |
| Face-framing | 2-3 inches past jaw | Creates vertical lines |
| Texture | Defined and directed | Creates internal lines |
| Color | Dark roots, light ends | Vertical visual gradient |
| Accessories | Worn high | Draws attention upward |
| Styling method | Directional, not rounded | Creates angles |
Your step-by-step approach:
- Get a cut with layers and height at the crown by a stylist experienced with curly hair and face shapes
- Ask specifically for longer face-framing pieces that extend past your chin
- Use a diffuser to maximize height when blow-drying
- Apply styling products that define your curls (gel, cream, mousse)
- Style with intention: twist-outs or braid-outs create the best shape
- Use accessories high on the head
- Trim every 6 to 8 weeks to maintain shape
- Own your round face; it is part of your beauty
Quick Checklist for Round Face Curly Hair Styling:
- Hair length at chin or longer ✓
- Significant layering throughout ✓
- Crown volume: maximum ✓
- Side volume: controlled ✓
- Face-framing pieces: present and longer ✓
- Color: dark roots, light ends (optional but helpful) ✓
- Styling: directional and intentional ✓
- Accessories: placed high when worn ✓
- Regular trims: every 6 to 8 weeks ✓
- Confidence: maximum ✓
- Natural Scalp Care Tips for a Healthier Hair Growth Journey - June 28, 2026
- 10 Best Lightweight Hair Oils for Straight Hair: The Ultimate 2026 Guide - June 27, 2026
- Is Hair Thinning Normal with Age? Understanding Contributing Factors - June 27, 2026