Chic Braiding Techniques: Transform Your Short Hair Today!
Forty percent of women with short hair feel limited in styling options, but braiding can dramatically change that perception. Mastering just a few techniques opens up a world of creative hairstyles that are both chic and practical, regardless of hair length.
Learning to braid short hair involves selecting the right techniques, using appropriate products, and practicing regularly. Keep your hair slightly damp for easier manipulation, and don’t hesitate to use accessories to enhance your look.
Mastering Basic Braid Techniques
Familiarize yourself with three-strand braiding. This fundamental technique serves as the foundation for various styles and is particularly adaptable for shorter hair. Begin by dividing a section of hair into three equal parts. Hold two sections in one hand and the third in the other, ready to weave them together.
Practice crossing the right strand over the middle strand, then repeat with the left strand. Continue alternating, ensuring each section remains tight yet not overly strained. Consistently pulling the strands will create a neat appearance suitable for short hair.
Experiment with tension while braiding. Short hair can be tricky, leading to loose sections if not managed properly. Adjusting your grip allows for better control over the braid’s tightness and overall look. Keep practicing until you feel confident with the technique.
Consider adding variations to your three-strand braid. Incorporating elements like twists or small hair accessories can enhance the overall aesthetic. Short hair is versatile, so don’t hesitate to try different looks that suit your personal style.
Creating French Braids for Short Hair
Begin by gathering essential tools. You will need a comb for sectioning, hair ties, and a few bobby pins. Make sure your hair is clean and slightly damp for better manageability. This preparation sets the stage for a successful braid.
- Section off the front area. Use the comb to create a triangle-shaped section at the crown of your head. Secure the rest of your hair with a hair tie to keep it out of the way.
- Divide the triangle into three strands. Hold the left strand in your left hand, the middle strand with your right hand, and let the right strand hang freely. Maintain a firm grip to ensure control.
- Cross the left strand over the middle. This creates the first crossover of the braid. Next, take the right strand and cross it over the new middle strand. Continue alternating these crossings.
- Add hair to each strand. Before crossing, gather a small section of hair from the scalp along with the existing strand. Incorporate this into the braid as you proceed, ensuring even tension throughout.
- Continue the process down the head. Repeat the cross and add hair technique until you reach the nape of your neck. Secure the end with a hair tie to finish the braid.
Practice makes perfect, so don’t hesitate to try multiple times. Each attempt will improve your skills and confidence in creating French braids.
Exploring Dutch Braid Styles
Begin by sectioning your hair into two parts. Use a comb to create a clean part down the middle of your head. This will help maintain symmetry and ensure your Dutch braid looks polished, even on shorter strands. Make sure to have a good grip on the hair to facilitate easier braiding.
Next, grab a small section of hair from one side. Divide this piece into three equal strands, similar to starting a traditional braid. Ensure each strand is manageable and not too thin. The size of these strands will affect the overall look of your braid, so adjust accordingly based on your hair length.
Cross the outer strands under the middle strand. This is the key difference between a Dutch braid and a French braid. By crossing under, the braid will pop out and create a three-dimensional effect. Keep your tension consistent to maintain the shape as you braid down the hair.
Continue adding hair to the braid. Each time you cross a strand under, incorporate additional hair from the sides. Focus on keeping your sections even and balanced, which is essential for a neat finish. This technique is particularly effective for short hairstyles, as it secures shorter layers effectively.
Finish by braiding to the ends. Once you reach the nape of your neck or the desired length, secure your braid with a small hair tie. You can gently tug at the braid to loosen it for a more relaxed look, allowing some strands to frame your face beautifully.
Understanding Fishtail Braids
Fishtail braids create a unique, textured look for short hair. This style involves weaving two sections of hair together, giving the appearance of a fish’s tail. The result is an elegant, intricate braid that suits various occasions, from casual outings to formal events. Learning this technique enhances your braiding repertoire, making it easier to style shorter locks.
Begin by dividing hair into two equal sections. Hold one section in each hand, ensuring the hair is smooth and free of tangles. Grab a small piece from the outer edge of one section and cross it over to the opposite section. Repeat this process, alternating sides, while maintaining tension for a neat finish. Aim for consistency in the size of the pieces you cross over.
Practice is essential for mastering fishtail braids, especially on shorter hair. Shorter strands may escape the braid, so consider using a styling gel or mousse for better grip. This will help keep the braid intact and add texture. Additionally, securing the end of the braid with a small hair tie will prevent unraveling.
Experiment with variations of the fishtail braid to create different looks. For example, a loose fishtail braid offers a more relaxed style, while a tighter version provides a polished appearance. Try incorporating this technique with other hairstyles, such as half-up styles or adding curls for a more romantic vibe.
Incorporating Accessories in Braids
Choosing accessories adds flair to braids, especially for short hair. Incorporate elements like beads, ribbons, or clips to enhance your style. These decorative pieces can transform a simple braid into a stunning hairstyle, making it stand out. Consider your outfit and the occasion to select the right accessories that complement your look.
- Beads: Use colorful or metallic beads to thread through sections of your braid. They add dimension and catch the light beautifully.
- Ribbons: Weave ribbons into your braid for a playful touch. Opt for contrasting colors to create a striking effect or matching hues for a subtle look.
- Hairpins: Decorative hairpins can secure loose strands while providing an elegant finish. Choose pins with embellishments that reflect your personal style.
- Flowers: Fresh or faux flowers can be pinned into a braid for a romantic vibe. This works well for casual outings or special events.
Experimenting with accessories can personalize your braided hairstyle. Mix and match different elements to create unique looks that showcase your creativity. Remember to balance the accessories with the braid’s size to maintain a harmonious appearance.
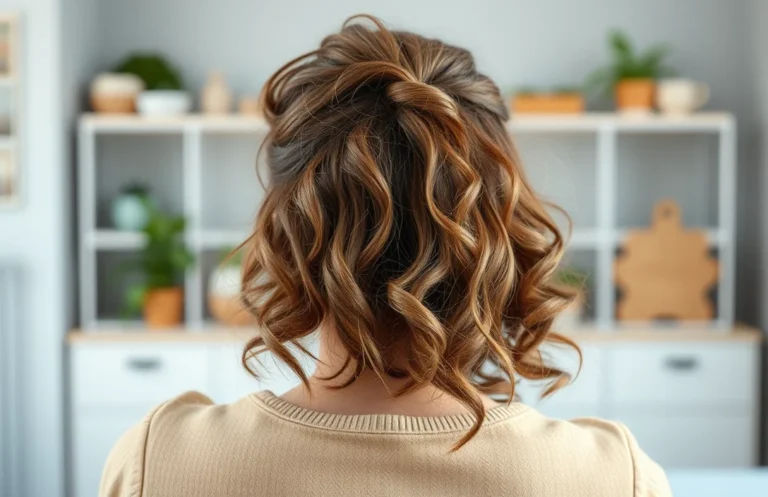
Designing Updos with Braids
Incorporating braids into updo hairstyles enhances the overall look, especially for short hair. Start with small, tight braids at the nape of your neck, then gather the remaining hair into a bun or ponytail. This technique adds texture and visual interest, making it ideal for various occasions.
Begin by sectioning your hair into manageable parts. Create one to three braids, depending on the desired complexity. Secure each braid with a small elastic band. This foundational step allows you to build your updo effortlessly.
Position the braids creatively around your updo. Wrap them around the base of a bun or let them cascade down for a more relaxed vibe. Secure the braids with bobby pins to ensure they stay in place throughout the day.
Experiment with different braid styles like fishtails or Dutch braids for added flair. Mixing various braid types can elevate a simple updo into a chic statement. Play with the thickness of each braid to create a unique and personalized look.
Complete the style by adding decorative elements. Consider incorporating hairpins, flowers, or ribbon to enhance the overall aesthetic. These additions can transform a basic updo into a stunning hairstyle that stands out.
Maintaining Braids and Hair Health
Regular maintenance ensures your braided styles remain fresh and vibrant. Cleanse your hair gently, focusing on the scalp, as dirt and oil can accumulate beneath braids. Use a sulfate-free shampoo to avoid stripping natural oils. Following cleansing, apply a lightweight conditioner to keep your hair hydrated without weighing down the braids.
Moisturizing is crucial for healthy braids. Opt for a leave-in conditioner or a light oil to nourish your strands. Apply these products sparingly to avoid buildup while ensuring your hair stays hydrated. Focus on the ends and areas that feel dry, allowing moisture to penetrate effectively.
Protecting your braids during sleep is essential. Use a silk or satin scarf to wrap your hair at night, reducing friction and preventing frizz. Alternatively, consider a silk pillowcase to maintain your style while you rest. This simple step can significantly extend the life of your braids.
Trimming split ends enhances the overall health of your hair. Schedule regular trims to keep your hair looking its best, even while in braided styles. Aim for a trim every 6-8 weeks, ensuring your hair maintains its strength and appearance.
Monitoring your hair’s health is vital. Pay attention to any signs of breakage or discomfort while wearing braids. If issues arise, consider taking a break from braiding to allow your hair to recover. Prioritizing hair health will ensure you can enjoy beautiful braided styles for years to come.
Quick Summary
- Prep short hair with a texturizing spray, sea salt spray, or mousse for grip and slight hold; detangle and work with slightly damp or dry hair depending on product.
- Use small sections and braid types that suit short lengths—mini three‑strand, Dutch/French, rope, and fishtail braids hold better than large braids.
- Keep tension firm but not overly tight to avoid breakage; secure ends with tiny clear elastics and anchor braids with bobby pins or hair clips.
- Favor half‑up styles, side braids, crown or halo braids, and accent braids to create the illusion of length and add interest without needing long hair.
- Use styling aids like dry shampoo, powder, or a bit of pomade to tame flyaways and improve braid hold throughout the day.
- Consider temporary clip‑in extensions or braided hairpieces for added length/volume; always remove gently and avoid sleeping in tight braids to protect strands.
Frequently Asked Questions
1. Can I braid short hair?
Yes, you can definitely braid short hair! While the length may limit certain styles, there are many creative options such as mini braids, cornrows, or using hair accessories to secure the braid.
2. What tools do I need to braid short hair?
To braid short hair, you typically need a brush or comb for detangling, hair ties or clips to secure the braid, and possibly some styling products to help manage frizz and add hold.
3. What types of braids work best for short hair?
For short hair, simple braids like French braids, Dutch braids, or fishtail braids can work well. You can also try braiding sections of hair and pinning them back for a chic look.
4. How do I create a messy braid with short hair?
To achieve a messy braid, start by loosely braiding your hair, allowing some strands to fall out for a relaxed look. Pull gently on the edges of the braid after securing it to add volume and messiness.
5. Are there any tips for beginners learning to braid short hair?
Start with small sections of hair and practice basic braiding techniques before moving on to more complex styles. Patience is key; practice regularly to build your confidence and skill!